I know, that it's not the most common approach to use constant light source to replace flash, but I decided to go this way by many reasons. My list of requirements was pretty simple:
- * Good color reproduction. Having long experience with color correction, image manipulation and analysis, I wanted as good result as possible without getting into a trouble with RGB or W+GR multi-LED light.
* Enough light to get exposures shorter than 1/20 with field of view larger than 5-7 mm (that's what I'm usually working with).
* Enough light to be able to shoot close-ups in addition to macro (and that's another reason for high CRI).
* Both portable battery power and wall socket power capabilities.
* Continuous operation.
Bridgelux specification tells us this:
- * CRI 97 (typical)
* 35W power
* typical current 1050 mA
* typical voltage ~32 V
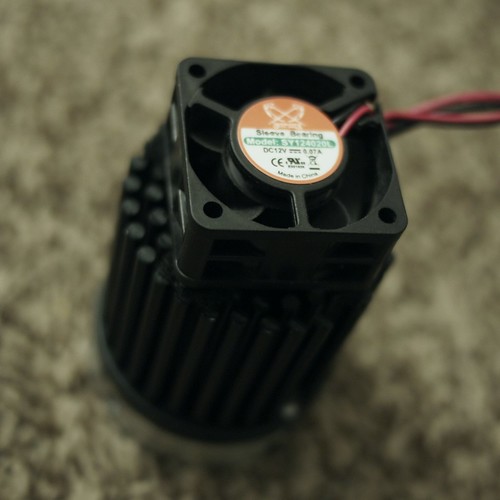
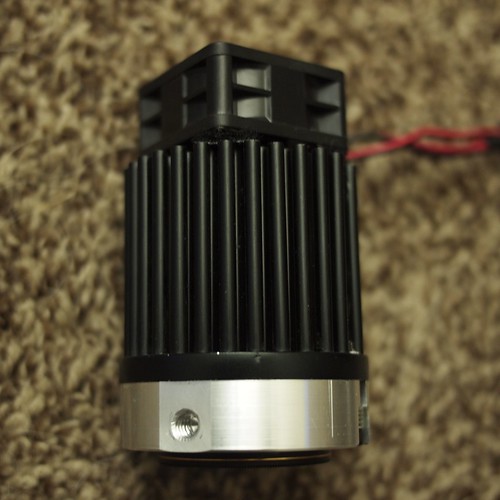
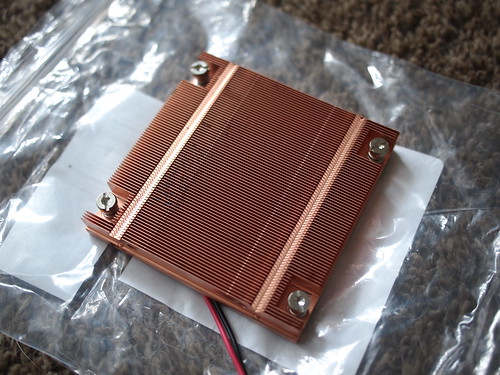
Heatsink is crucial for 35W module to avoid overheating, and it's not that simple to get enough heat removal with passive heatsink. Therefore, I decided to use a bit smaller one than it's required and to add tiny fan to it. I've got noname round pin-type heatsink with 60mm diameter and 50mm height. If there would be anything a bit higher with heat pipes, I would go for it, but for now, I have no other variants. When used for relatively short periods of time (about 2-3 minutes) with long delays (7-10 minutes), current passive cooling setup works fine. For sure, I had to remove anodizing from contact surface and put thermal grease between heatsink and LED.
Fan, (currently - temporary) attached to its rear surface, does its job during continuous operation. It's 40×40×20mm 12 V 70 mA Scythe brand fan (intended for motherboard chipset cooling or something). I can't feed it from LED power bus, because it will interfere with constant current driver, so it should be connected to driver input, not output. To make sure I have nice 12V, I'm using some tiny noname Chinese step-down (buck) converter from eBay, capable to take 4.5..36V and give 0.8...30V (adjustable).
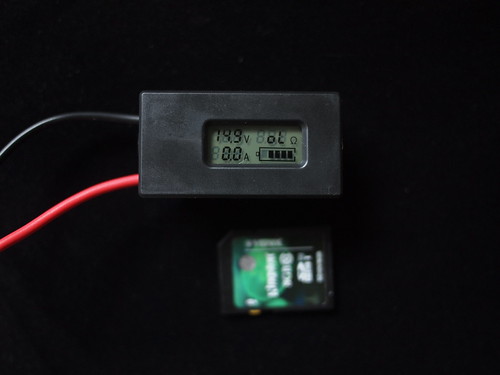
To feed the whole setup, I'm using handmade pack of four rechargeable 26650 cylindrical type Lithium-ion cells 3500 mAh, 3.7 V. They are connected in series. There is no charge gauge currently, but I'm going to add one. They giving more than 12V, therefore, I don't have to use buck-boost converter to feed fan, buck converter is enough. Each battery has overcharge/overdischarge protection circuit built in (batteries are labeled "Protected"), therefore, I don't have to worry about killing them by sucking too much juice from them without having charge gauge - they will just shut off by themselves. It's possible to control charge level by pocket voltmeter.
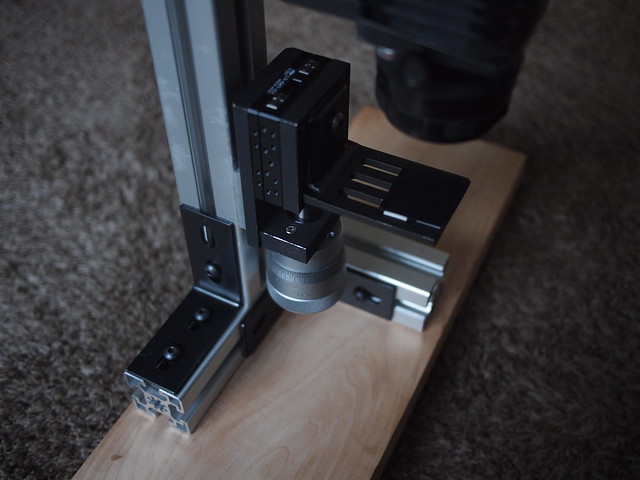
The most tricky part was to make a kind of bracket to hold LED module on the heatsink. Fortunately, I'm a CNC programmer, and I have certain access to machines. So, I designed aluminum bracket in Mastercam and made it of aluminum using Haas CNC vertical mill. Bracket has a pocket for LED with some extra space to compensate for heat expansion, indexing studs to avoid rotation of LED inside it, channel for wires (by the way, I'm using dedicated Molex wiring harness for this LED, available from Digikey and other suppliers), flat portion it its side to accommodate 1/4-20 threaded mounting hole to be able to attach it to standard photo mounting gear. Front side has built-in parabolic reflector, some sort of pocket for protective glass and slots for screws to attach the whole thing to the heatsink. Mounting screws are spring-loaded to compensate for heat expansion of LED thickness too.
I know, that there are factory-made brackets for these LED modules, as well as reflectors, but they look awfully flimsy. My goal was to make it not really rugged, but solid enough to survive hiking trips in my backpack.
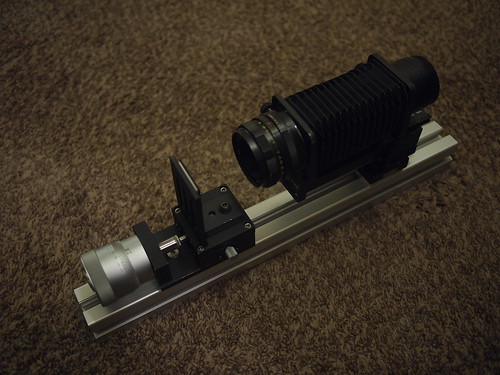
With built-in reflector only, it gives me 110º flood beam. With additional condenser lens (really lousy one, using it just for testing) it goes down to 40º beam. For sure, I'm going to experiment more with focusing system to get narrow spot light (specific suggestions are really welcome).
Here are some pictures.
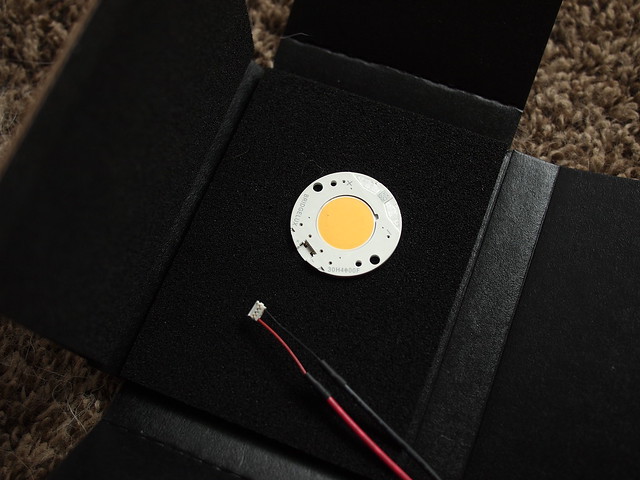
LED module in original package (nice black anti-static foam, by the way) with dedicated Molex wiring harness
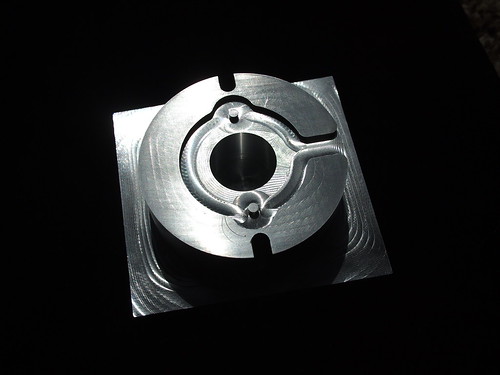
LED bracket after machining back side (LED pocket, indexing studs and wire channel are clearly visible)
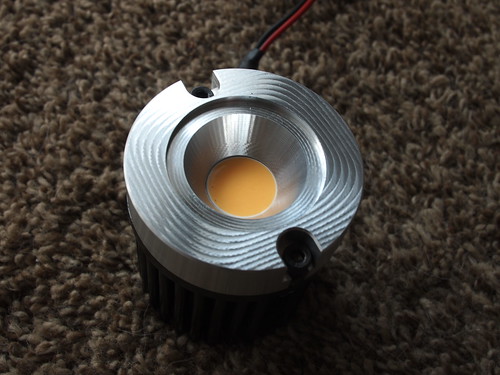
Front side of finished LED bracket (already attached to heatsink)
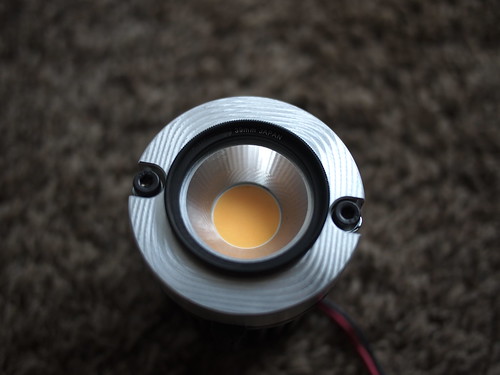
Protective glass filter glued in (I'm using cheap 39mm UV filter - it also gives me an additional mounting option for diffuser, add-on lenses and so on)
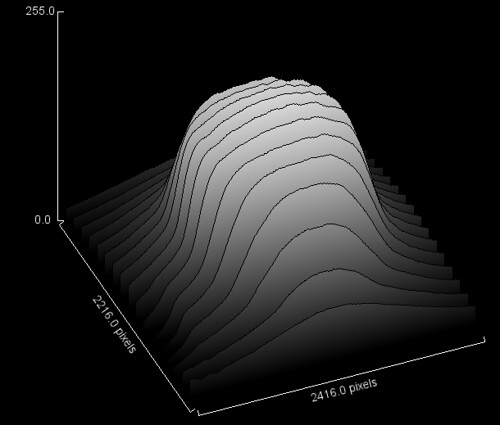
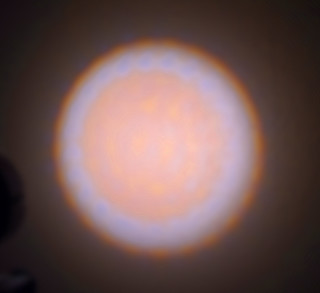
Brightness uniformity test of 40º beam (photo of light spot on uniform white surface was analyzed in ImageJ for intensity)
Four times amplified color non-uniformity test of focused 40º beam. Normally, you can't see this, because color intensity of test photo was intentionally amplified. And it's easy to reduce existing non-uniformity by using focusing system with "wrong" focal point to get certain grade of diffusion on first element.
Power pack with constant current driver assembly. Switch is connected to driver's "disable output" pin to avoid using high current switch. Power pack has XT60 connector (standard for some RC model power packs).
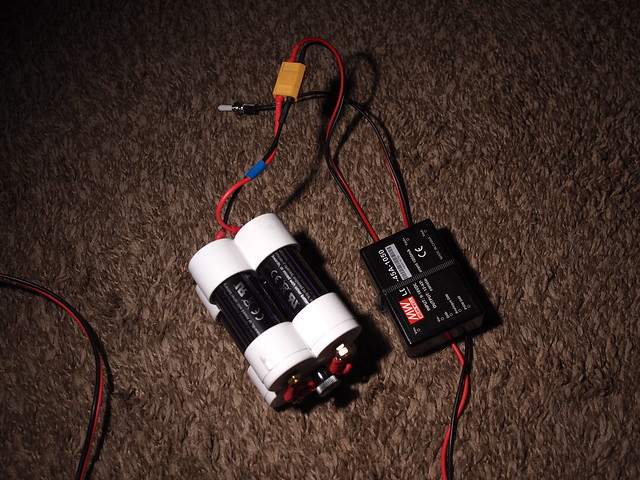
I don't recommend making power packs this way (PVC caps glued together with PVC cement, equipped with spring-loaded contacts and fastened together with threaded rod). I just got 26650 for half price, that's why I'm messing with them. Otherwise, I would use 18650 cells and widely available holders for them.
So, basically, that's all. Feel free to ask any questions.