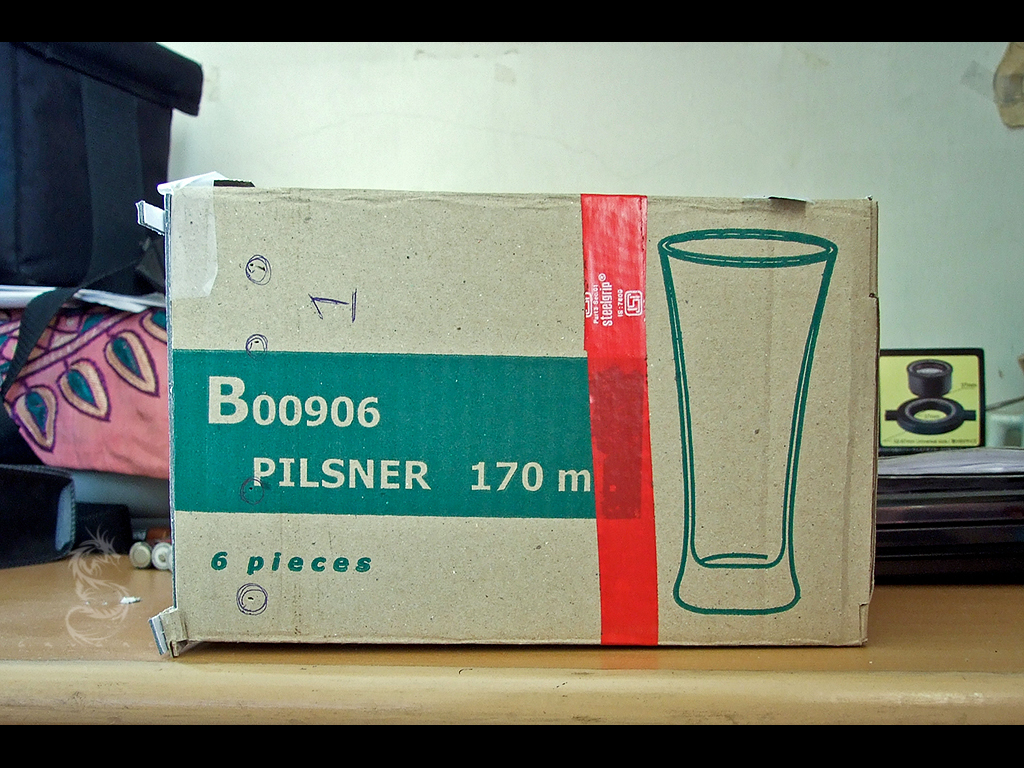
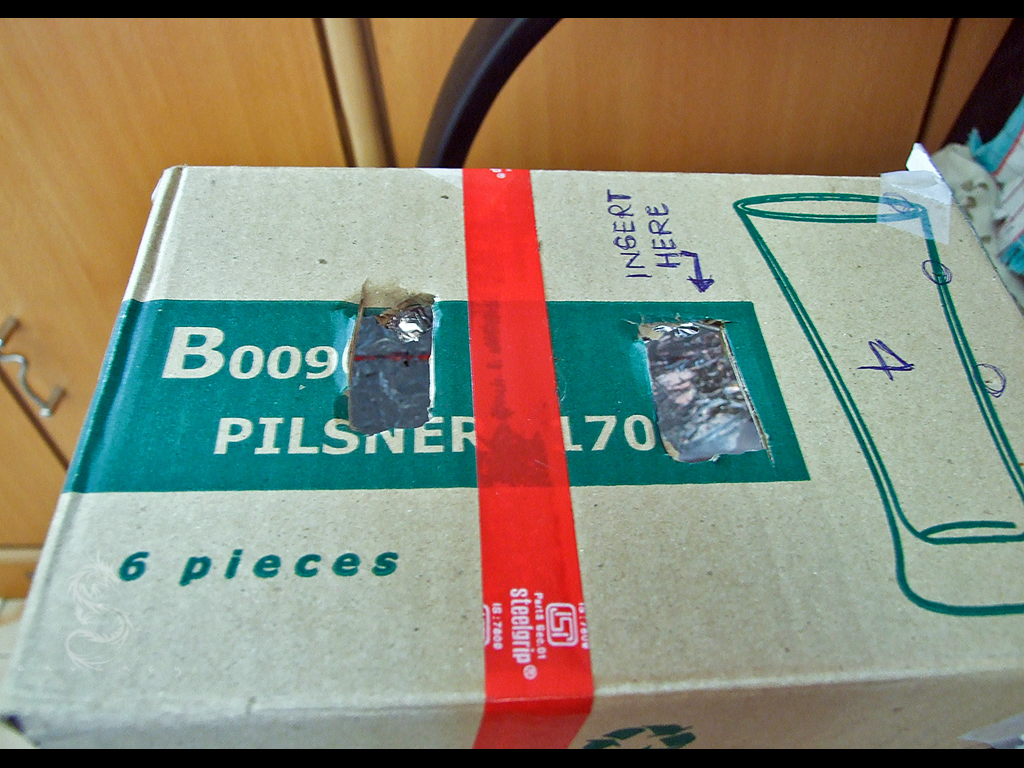
For the main box,I chose a glass holder box.These days we get those 6 pieces glasses made in korea and stuff.These are available at most crockery shops/shops selling glassware.check with them.Or else you can either gift yourself or your love some new pieces of juice glasses.

The biggest advantage of these boxes are:
1.They are recycled.
2.They are sort of reinforced cardboard.
3.They are light.
4.They are relatively short.
This box perfectly fits the barrel of most prosumers within the 10-15x zoom range.The length of the box runs exactly parellel to the barrel of the lens.So you are giving direction to the light which is parallel to your lens.
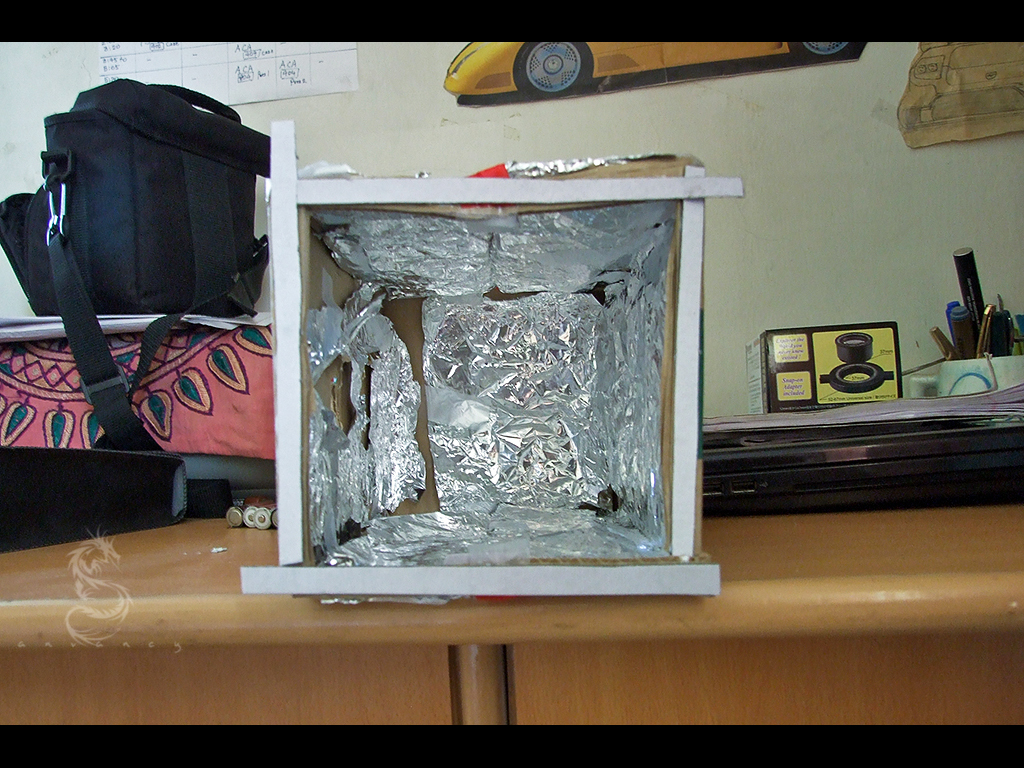
The box had certain embedded cardboard holders.So when we open the box from right side up,there were 6 exact cubes inside the box for the glasses to rest.The Dividers were total 4.Two on the right side up.Two below.
So first,We have to cut those dividers making the inner section a complete open area box.(which is inside)
Choose any one of the squares of the box at either ends.
Take a cutter.And start cutting the square.But we dont have to cut the square from the edge.Instead cut a square inside the existing square.This way,You are actually using the existing cardboard square as your first support system for your diffuser.
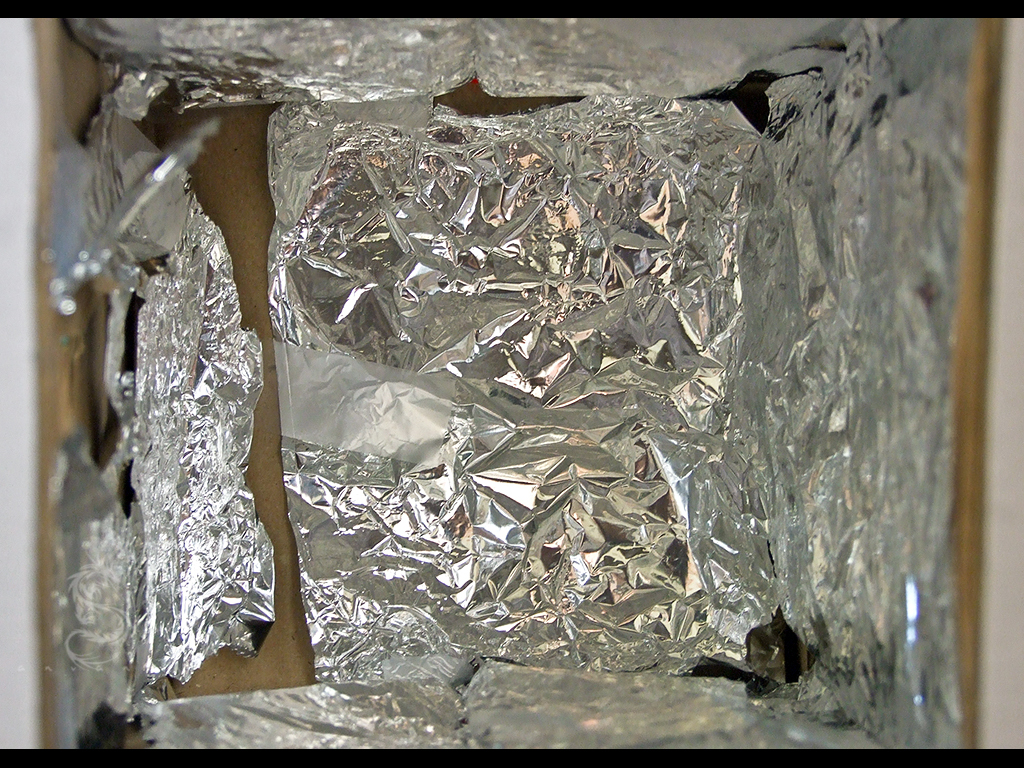
Now we need a reflecting material.Aluminum has around 95% reflecting capacity.So borrowed my mom's kitchen foil for the inner reflection material.You can also apply silver reflective back gift wrapping paper instead of aluminum.
More on the inner setup on next image.
So I chose Aluminum for my reflective material.
The thing is that,when we will fire the flash through the box,there will be obvious loss of light.The box without any reflective material will be one dark box inside.So when the flash actually fires,its hitting all the walls inside the box minus the reflective material.End result,you will get very less light.
The Solution???
Reflective material.Aluminum suits best since it can be moulded and crapped and crushed to tiny bits.
One thing to note here is that we dont want too much reflective material inside.If we do have heavy reflective material inside,the light will be on the verge of becoming out of control and the diffuser that we will put may not be able to diffuse or handle that spontaneous burst of high light.So we want to put the material but not too much.Thats what I did.And thats why you see my hoch poch work!
Apply the paper one section at a time.Apply sufficiently.When all the sections are sufficiently either glued or taped with your reflective material,we move to the next step....
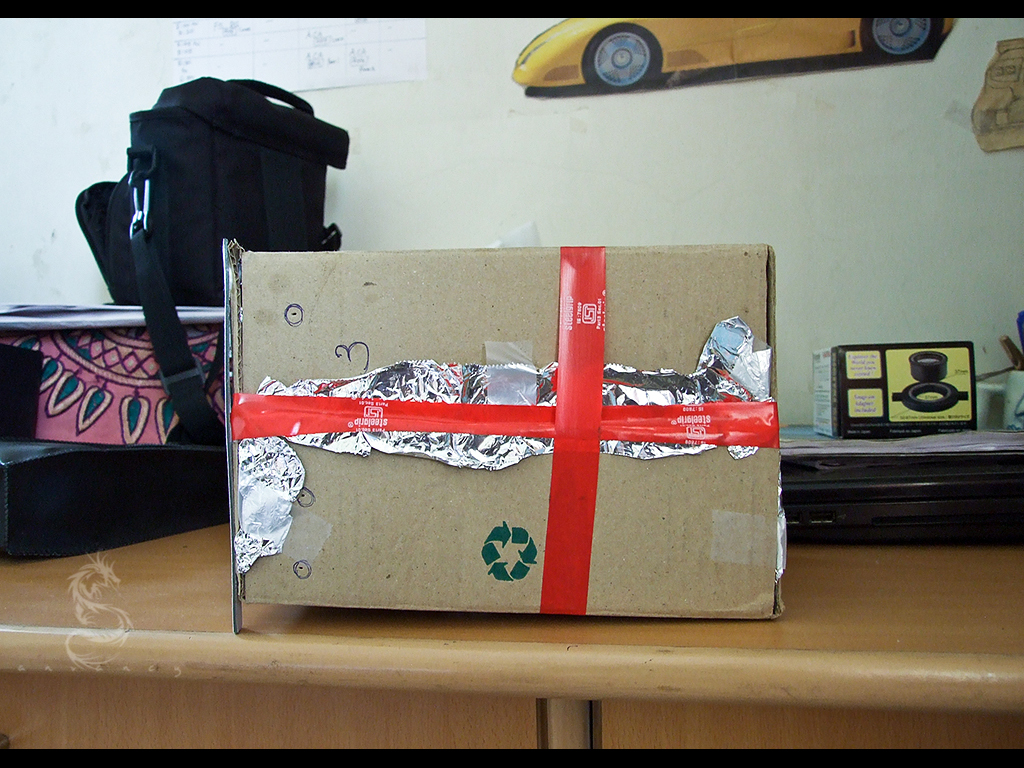
Once you have put the foil inside,its time for sealing the box from the outside.I taped my box with gaffer tape.I sealed all the openings of the box from outside.To further seal and strengthen the box a bit I ran tape the square wise.Sort of making a plus sign on the box.
When you finish,the first thing you will notice is that,inspite taping the box,the openings will move.Dont worry.We want to keep some flex to the box.Making the box too rigid may crush the box upon sudden impact or rugged usage.The slight flex will help in holding the box,and while placing it,and in general usability.
Once you have taped the box,you can cut out the extra foil that is coming out of the tape.
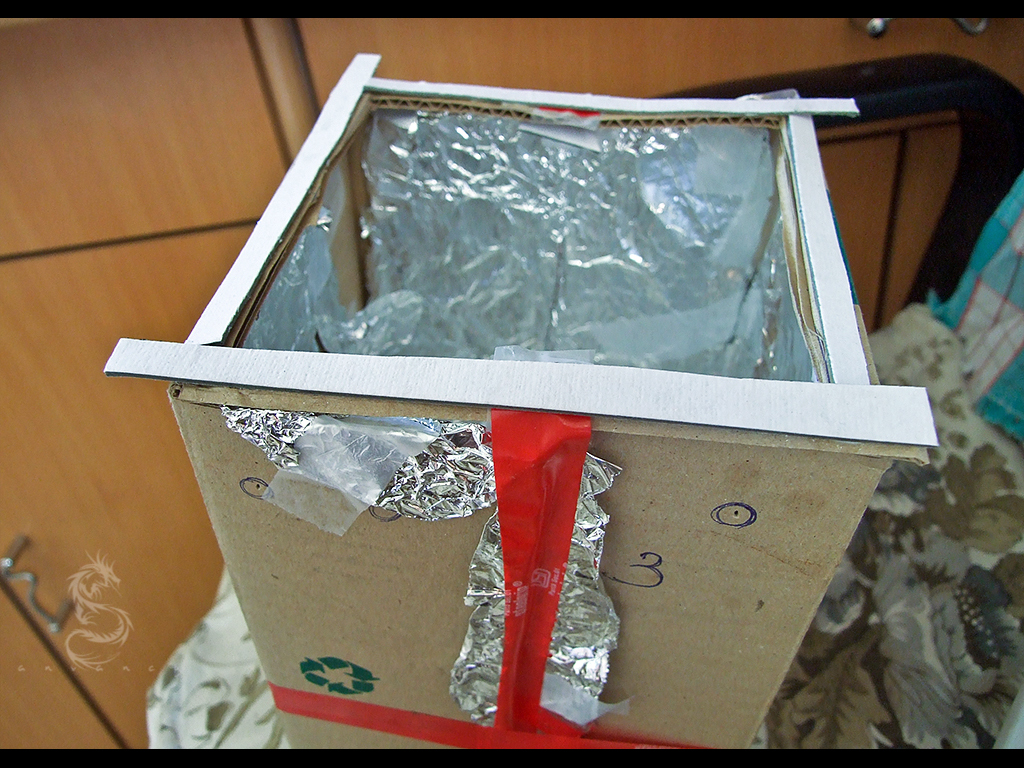
Now make the cut square portion side up.
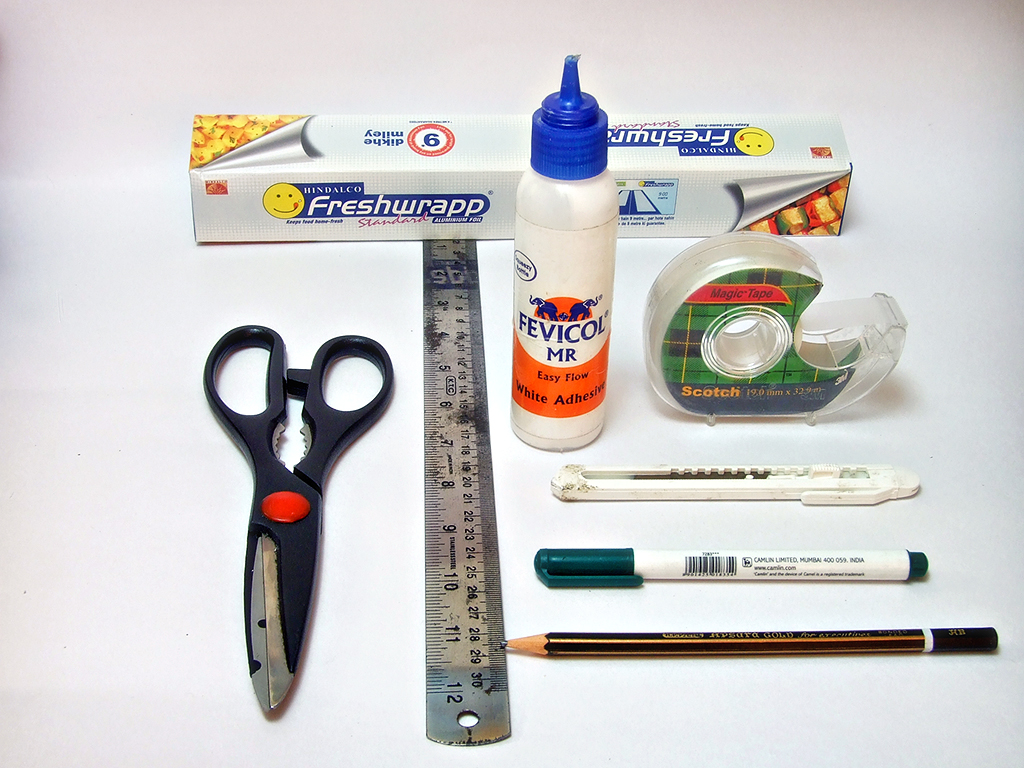
Take some cardboard.Cut out 4 thin long pieces of the cardboard.Stick one piece at a time.Cut out the excess part of the piece to fill our square framing with our reinforced pieces...
Ill recommend here to glue these pieces instead of taping it.Glue makes it stick better and make it harder once it dries off.
These support bars will give a base for the diffuser to rest and will also strengthen the diffuser with the body.
On to the next step...
Again choose any one side of the longer rectangle side.
Take a piece of paper.Draw your flash structure on it.Now place that paper on the box.
Take a cutter.Start cutting the shape on the box.
The important step here is to cut delibrately small.The point here is,If we cut more than our flash size,the flash will go through but will not sit tight.So the moment you move your cam,the box will jiggle and fall off.
By cutting small than the size,you gently force your flash through the cutout hole.This way your flash makes way through the hole which is only needed.Not excess.The flash will sort of lock into the box and will not move much.
Some will like to make the hole in the center for gravity purposes,but i made two holes,one in the front and one in the back.
Next Step Please...
I first had butter paper as diffuser in mind.But the problem with butter paper was,you have to apply it layer by layer.So you apply a layer,take a shot,check the diffusion.Less diffusion,add more paper.More diffusion?Less paper.
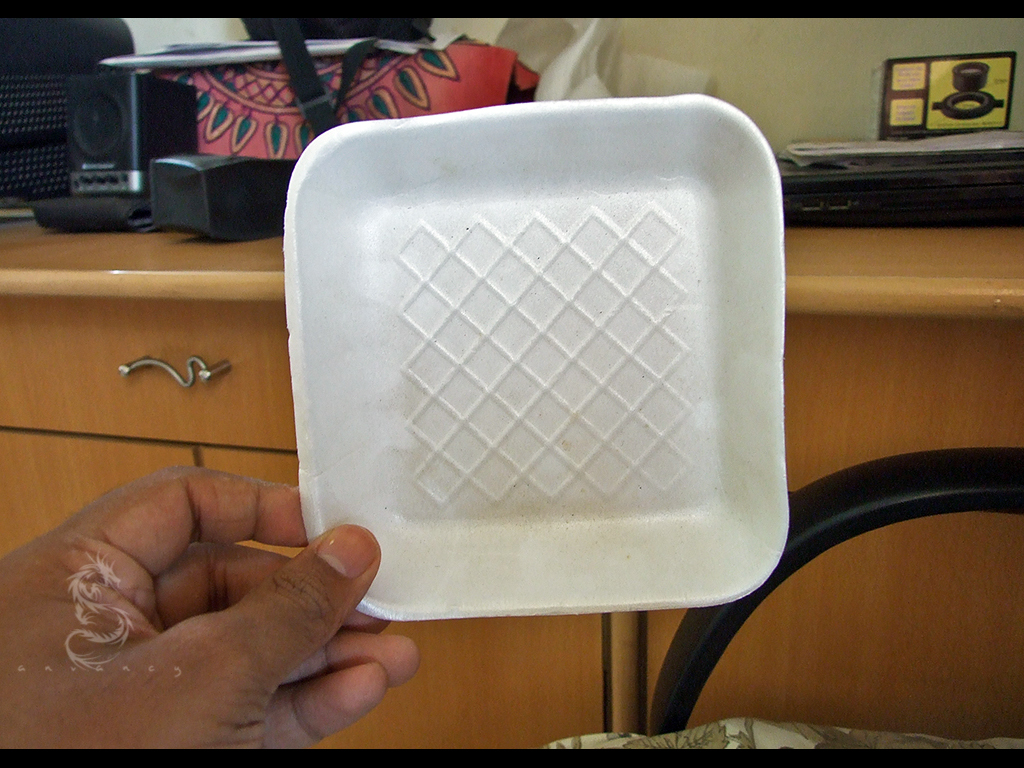
Instead I chose this.its a bio foam square dish.Here in my place we get nice cherry tomatoes in these.I had kept it way back preserved then not knowing what to do with it until now.This thing we can get in plastic/stationery shops.
I took this for 2 reasons.
1.its depth is perfect for me.Not too much and not too less.
2.This provides a bit of warmth in the flash light unlike usage of butter paper which gives a cool look.
Glue this on the support bars on the open side.Apply a thin layer at first.
Gently press the dish on the support system.If there any gaps,put some more glue and gently press on it.It will stick.Give it 5-10mins to completely dry off.
We are very close now...Next step.

So after doing all the steps,our product looks like this.Lets check from another angle.
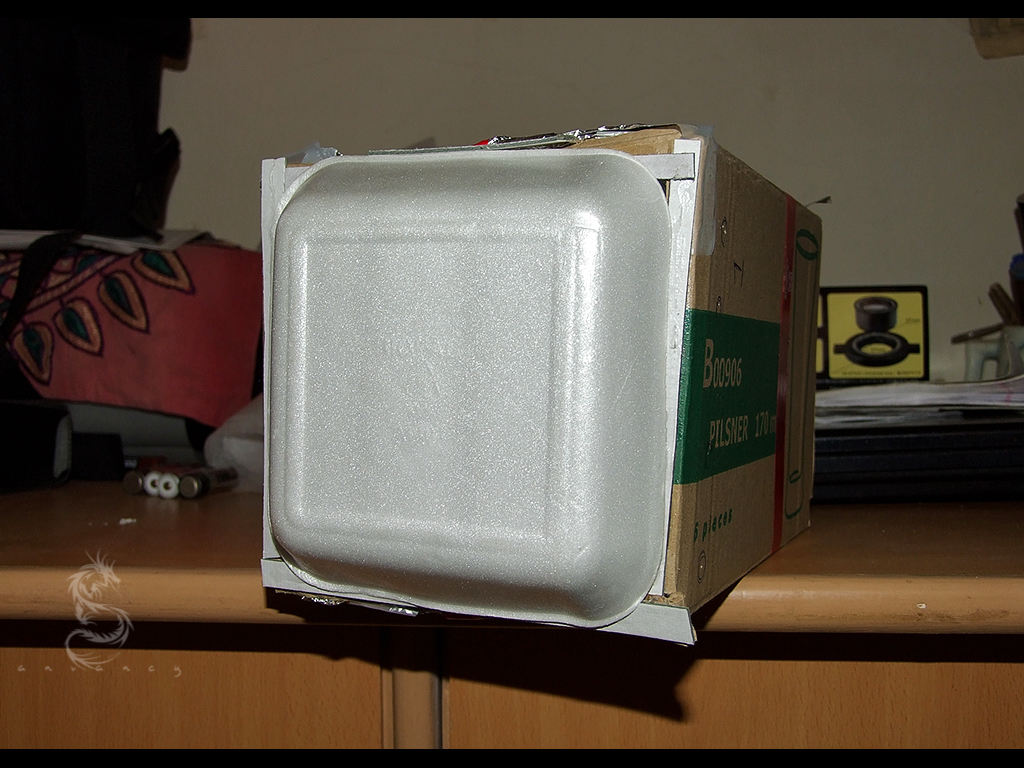
After constructing,the final product looks like this.
Lets see our first test.
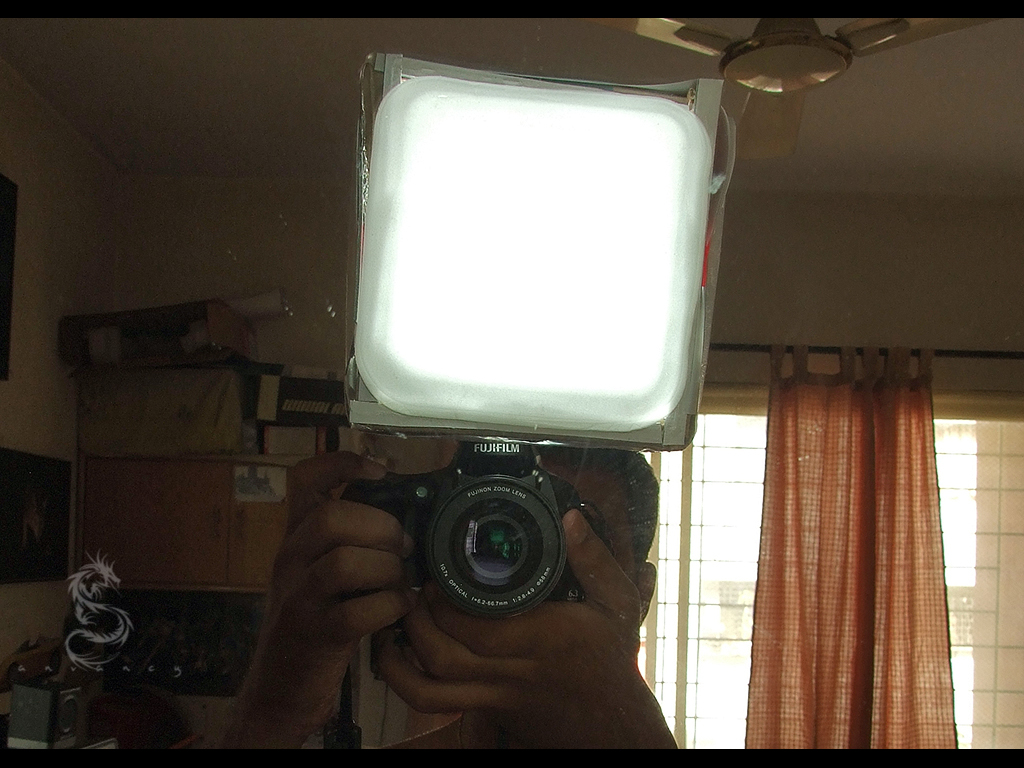
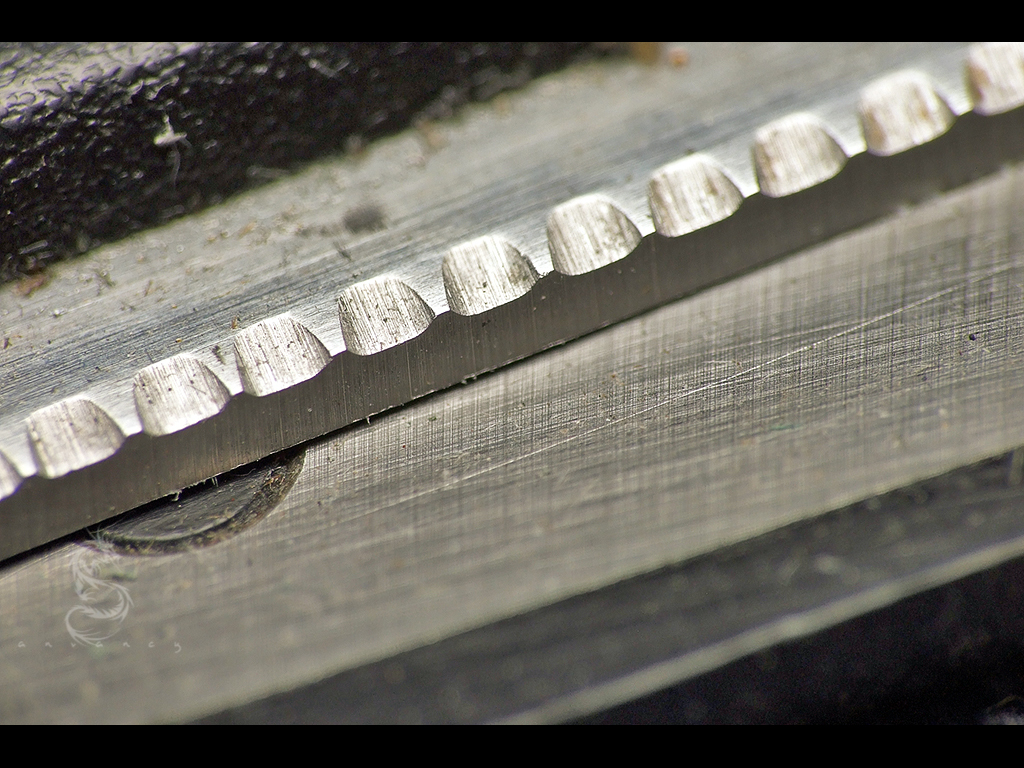
Firstly check how FUJIFILM is softened.
This is at +/-0 flash setting.You can clearly see the flash is getting powered by those reflectors inside but is getting properly diffused while coming out.
Next Subject please...
Took my raynox 250.attached it.And the box.Took my scissors as second subject.
The light is evenly spread.No harsh highlights or shadows.Simple evenly spread light.Interesting.
Next subject please...
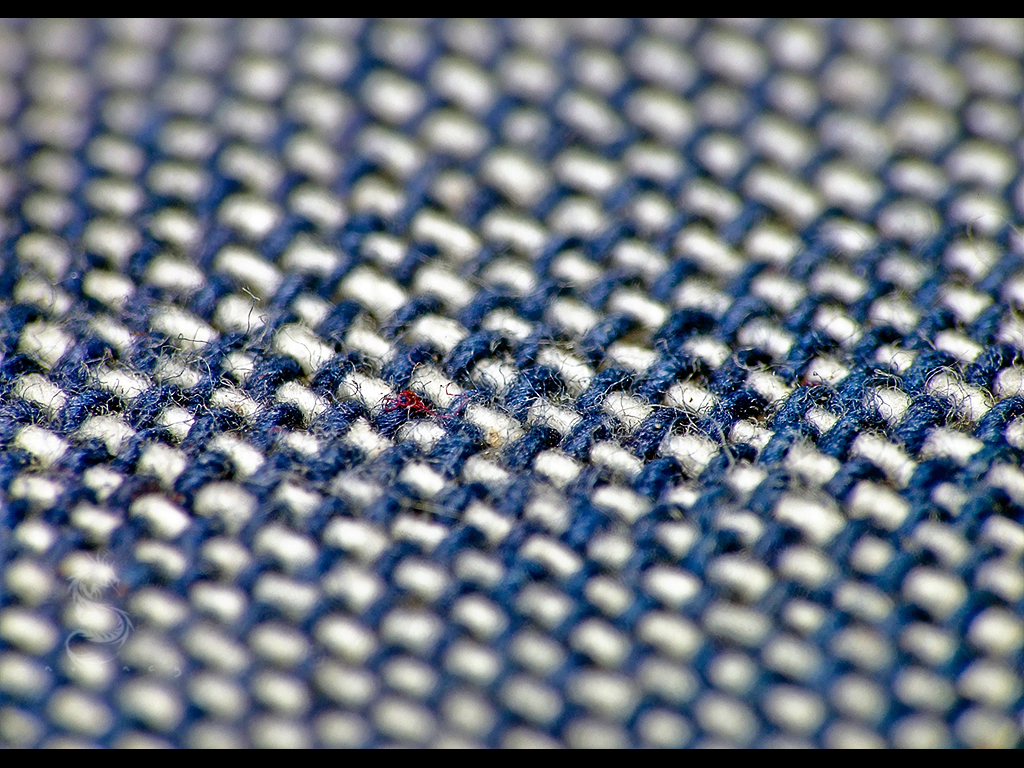
Next I aimed at my pillow cover and fired a shot.in this image also the threads are evenly lit.
Decoration Time...Next please.
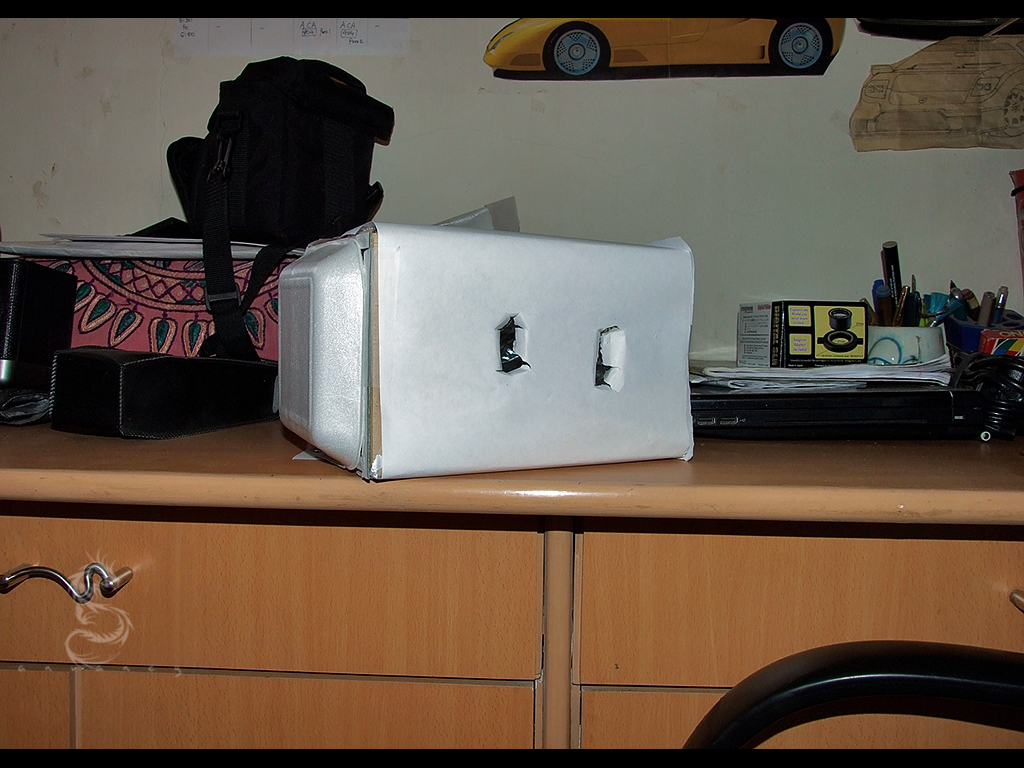
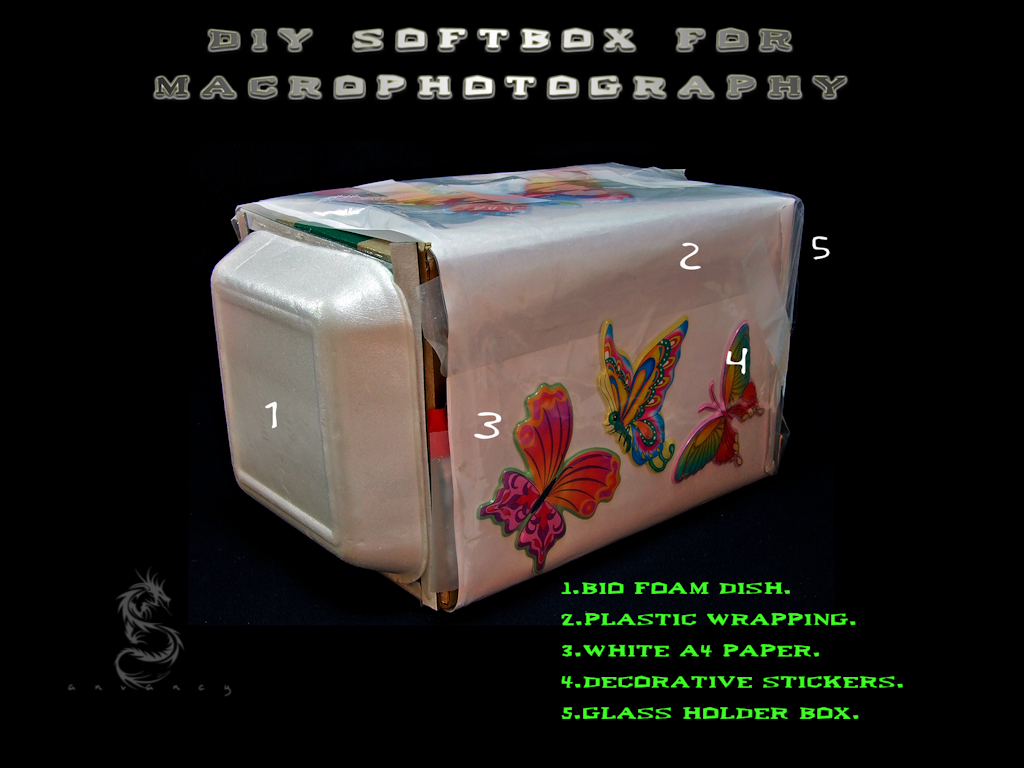
We will make our box a little more presentable.So i first wrapped it with plain white 2 sheets of A4 paper.Made holes in the right spots.So now our box looks more tidy.
More Decoration...next.
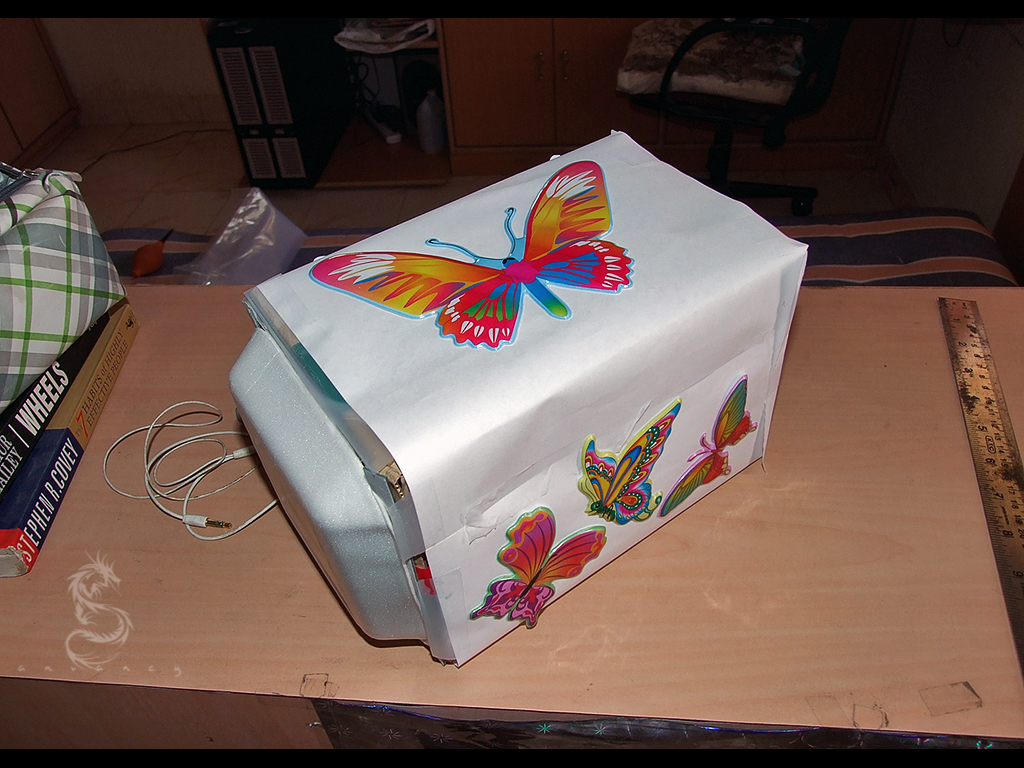
I wanted to really decorate my box.And since macro was my intention,I ventured out in the market searching for some insect stickers.
It turned out that there is few demand for insect stickers.More is on ben10 and such.So came home with some nice butterflies stickers.
Decorated with them.
Finally....Next...
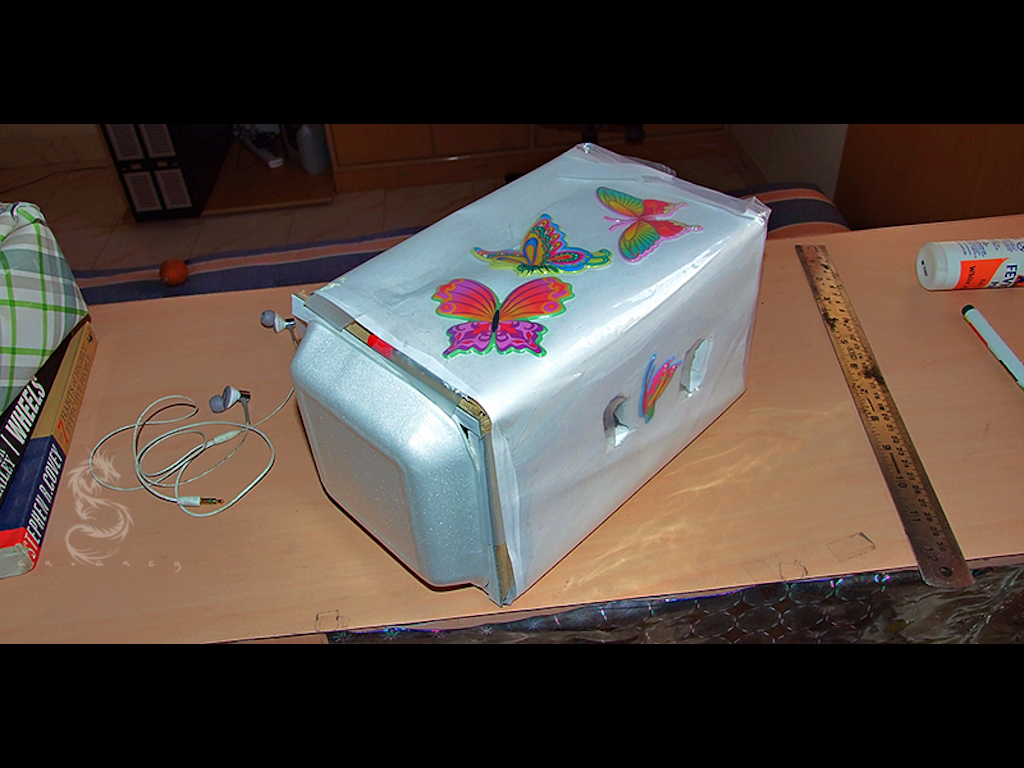
I went one step further.I used a plastic sheet.Wrapped the box with it.Made it somewhat water resistant.
Hope you all like it.
More Test Images are gonna follow.So do keep a check here.
Thanks
Suggestions and Tips Welcome.
Anvancy