Pinned specimen orientation

A forum to ask questions, post setups, and generally discuss anything having to do with photomacrography and photomicroscopy.

Moderators: rjlittlefield, ChrisR, Chris S., Pau

NikonUser
Posts: 2693
Joined: Thu Sep 04, 2008 2:03 am
Location: southern New Brunswick, Canada

Pinned specimen orientation

Post by NikonUser »

I found this gizmo useful to orientate this small fly for a face shot. It's BioQuip #6188 Microscope Stage.
I have seen better quality stages at a higher price but this one has worked well for longer than I can remember

MICROSCOPE STAGE

Image

NU09165
Last edited by NikonUser on Tue Sep 22, 2009 8:09 am, edited 1 time in total.
NU.
student of entomology
Quote – Holmes on ‘Entomology’
” I suppose you are an entomologist ? “
” Not quite so ambitious as that, sir. I should like to put my eyes on the individual entitled to that name.
No man can be truly called an entomologist,
sir; the subject is too vast for any single human intelligence to grasp.”
Oliver Wendell Holmes, Sr
The Poet at the Breakfast Table.

Nikon camera, lenses and objectives
Olympus microscope and objectives

elf
Posts: 1416
Joined: Sun Nov 18, 2007 12:10 pm

Post by elf »

If I'm interpreting this correctly, it gives you 2 degrees of freedom. Can you lock it in position or is everything just a snug fit?

If you put the subject at the rotation point of both axes, you could do some interesting 3d movies. A piece of the ProtoStar flocking would make a nice background.

g4lab
Posts: 1437
Joined: Fri May 23, 2008 11:07 am

Post by g4lab »

That companys' prices are great. They have another holder that is very nice too. Thank you for the link.

AndrewC
Posts: 1436
Joined: Thu Feb 14, 2008 10:05 am
Location: Belgium
Contact:

Post by AndrewC »

Interesting to see. I made something similar out of bent aluminium strip (no photos I'm afraid) with a 3rd degree of rotation. Two degrees is relatively easy, getting the third axis is more challenging to make elegantly. I had something working, imagine the stage shown here with a small L bracket attached where the current pin is, now the pin is held horizontaly at the level of the side rotation point, pinned subject held at the centre point for all three axis. It was all very clumsy and led to several specimens being lost. In the end I gave up and went hunting on ebay for a goniometer which is currently being held hostage by the Belgian Tax Authorities.

What I'd actually like to do is make some 3D wireframe renderings but the software is very expensive and i'm not sure how well it would cope with fine details. It would be pretty cool though - imagine a 3D stack of a fly you could spin on any axis. I made some spherical panoramas a while ago, but it is easier to "look out" at the inside of a cube rather than "look in"
rgds, Andrew

"Is that an accurate dictionary ? Charlie Eppes

Barry
Posts: 157
Joined: Sun Jan 18, 2009 9:34 am
Location: Netherlands

Post by Barry »

How would you imagine the ideal specimen positioner?
As mechanical engineer I could design something.

Just a thought.

Kind regards,
Barry

NikonUser
Posts: 2693
Joined: Thu Sep 04, 2008 2:03 am
Location: southern New Brunswick, Canada

Post by NikonUser »

elf: can't be locked but holds its position OK

Barry: Great, let's hope between all of us here we can come up with a design.
This current design does work but the horizontal handle part and the upright post sometimes blocks out the light source from that side.

Below is the Cadillac of specimen manipulators, with a Cadillac price tag. Of course, I have no idea how to price such things.
SEE HERE
NU.
student of entomology
Quote – Holmes on ‘Entomology’
” I suppose you are an entomologist ? “
” Not quite so ambitious as that, sir. I should like to put my eyes on the individual entitled to that name.
No man can be truly called an entomologist,
sir; the subject is too vast for any single human intelligence to grasp.”
Oliver Wendell Holmes, Sr
The Poet at the Breakfast Table.

Nikon camera, lenses and objectives
Olympus microscope and objectives

AndrewC
Posts: 1436
Joined: Thu Feb 14, 2008 10:05 am
Location: Belgium
Contact:

Post by AndrewC »

Ideal stage isn't difficult (and if Chris would post his setup you could probably see it) but expensive unless you are lucky on used equipment.

2 axis goniometer on top of a rotation platform.

That way you don't have any obstruction of the subject apart from the mounting pin (and with a powerfull enough magnet you could probably levitate the subject !!!).

Andrew
rgds, Andrew

"Is that an accurate dictionary ? Charlie Eppes

Peter M. Macdonald
Posts: 187
Joined: Tue Jan 20, 2009 2:59 pm
Location: Berwickshire, Scotland

Post by Peter M. Macdonald »

Not very pretty, but the positioner at the bottom of http://www.watdon.co.uk/the-naturalists ... ories.html works very well. It has two axes of rotation built in. As the base is round, it is quite simple to turn the whole thing around by means of the handle shown on the right on the web page. Easy enough to replace the cork on the end of the spindle when it wears out with either a slice of a cork from a wine bottle or a small piece of Plastazote. The price is not bad.

Unusal disclaimer of all connections with Watkins and Doncaster except as an occasional customer for more than 30 years.

Peter

elf
Posts: 1416
Joined: Sun Nov 18, 2007 12:10 pm

Post by elf »

Would this qualify as the ideal stage? http://www.photomacrography.net/forum/v ... =universal

Eric F
Posts: 246
Joined: Tue Nov 11, 2008 1:38 pm
Location: Sacramento, Calif.

Post by Eric F »

I've favored the type of microscope stage that NU showed at the beginning of this topic for decades! Definitely the favorite in N. Amer. for looking at specimens under a stereo scope. Lately, I have been using a different design for photography of pinned specimens: one that is made up of a brass ball that has a hole -- to hold the pin in a piece of clay -- that rests on a brass cylinder. The ball can rotate in many directions, and place the specimen in almost any orientation for photography. Furthermore, less of the stage apparatus gets in 'the way' of the photo process (my main objection to the standard microscope stage: it seems that the arm is often visible in the photo background, etc.). Another reason I like the cylinder + ball is the compact size, which allows the placement of the stage inside an LED dome light; the standard stage is way too big for this. I paint the material photo gray and use gray foam also.

Sometime ago I (February?) discussed an older version of the dome light; this light is treated in some detail on this site: <http://www.cdfa.ca.gov/phpps/ppd/entomology/dome.html> . Since then, I have been using a newer type dome (the "YK-B144T" shown here) which is better because it has a lower profile (easier to use under certain stereo scopes with less working distance) and more 'arena space' inside of the ring of LEDs; the outer diameter is the same as the older dome -- so the same plastic bottle top can be used as a reflector (which is flat white inside). (This dome is also available from "Gain Express" in China -- at the same cost as the other one.) Enough space to place a cylinder + ball to hold the specimen in position underneath the dome hole -- as shown. I like the ball holder so much that I built one to use independent from a dome -- using a longer cylinder (about 4 cm tall) glued into a couple of heavy washers as a sturdy base. The disks provide a photo gray background that can be raised or lowered. This last specimen holder is usually used for flash photography -- where it rests on a linear translation stage -- that is raised or lowered beneath the camera setup.

Final shot is a Pyrgotidae fly (Sphecomyiella valida) photographed (Canon 40D, MP-E @ 2x) under dome light (20 slices @ 0.1mm, ZS). The fly was found in Arizona at a black light sheet at night; a suitable place for a nocturnal fly that parasitizes scarab beetles.

Image Image Image

Charles Krebs
Posts: 5865
Joined: Tue Aug 01, 2006 8:02 pm
Location: Issaquah, WA USA
Contact:

Post by Charles Krebs »

Craig just posted what I want here. Barry, if you can duplicate this I'll give you $50 for one :wink: :
http://www.photomacrography.net/forum/v ... php?t=6088

Actually I have always liked the idea of a rotating ball or hemisphere. I've never bothered to make one up, just use a little camera ball-head. But I've cataloged a few ideas.

What I would like is derived from the next few links/pictures...

A while back Wim posted this:
http://www.photomacrography.net/forum/v ... php?t=3895
I liked the idea of the ball rotating on a magnet. But since I would prefer a "flat" platform (for putting cork for pins, laying down a flat subject, etc) it should be "reversed".

The picture below is a stand made by snrmachine.com. This, and the ball and platform below it are far too large for this purpose but the idea is good. The problem is if these are miniaturized there is not enough mass to hold things ion place. That where the magnet comes in.

Image

Image

What I'm thinking of is a miniature version of the two hemisphere stands. The base would be a spherical magnet, about like the .75" diameter ones seen at EBay # 150190123290. This magnet is rigidly attached to a base of some type. The platform top is a Delrin (or similar material) piece with one side machined concave to match the radius of the spherical magnet, and the other side flat. It is thin, and a circular flat piece of steel is attached to the top of this Delrin piece. This causes the magnet to pull the top platform snugly to itself, but would allow easy smooth adjustment in any angle or rotation. You could have a variety of these little top "platforms". Some might have cork for mounting pins, others just have a plain flat surface.

(Part of the platform piece could be made up from a a "ring" cut from a tube... perhaps something as readily available as a plastic plumbing fitting. But it would be best if the surface in contact with the spherical magnet were machined to a matching radius to provide smooth movement.)

elf
Posts: 1416
Joined: Sun Nov 18, 2007 12:10 pm

Post by elf »

Charles Krebs wrote: What I'm thinking of is a miniature version of the two hemisphere stands. The base would be a spherical magnet, about like the .75" diameter ones seen at EBay # 150190123290. This magnet is rigidly attached to a base of some type. The platform top is a Delrin (or similar material) piece with one side machined concave to match the radius of the spherical magnet, and the other side flat. It is thin, and a circular flat piece of steel is attached to the top of this Delrin piece. This causes the magnet to pull the top platform snugly to itself, but would allow easy smooth adjustment in any angle or rotation. You could have a variety of these little top "platforms". Some might have cork for mounting pins, others just have a plain flat surface.

(Part of the platform piece could be made up from a a "ring" cut from a tube... perhaps something as readily available as a plastic plumbing fitting. But it would be best if the surface in contact with the spherical magnet were machined to a matching radius to provide smooth movement.)
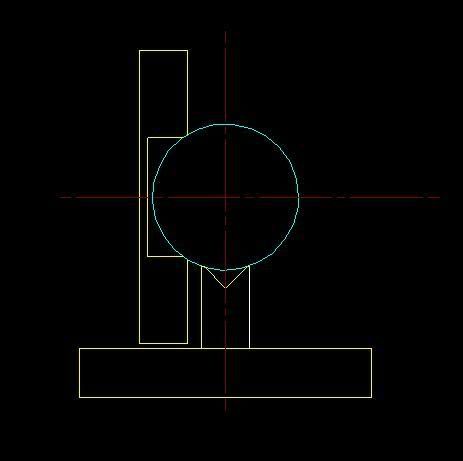
There isn't any need for the Delrin piece to be machined to match the sphere. It just needs to have a hole machined slightly smaller than the radius of the sphere. A 3/8" thick platform, 2" in diameter on a .75" radius magnet would be able to tilt about 15 degrees in any direction unless it was raised on a stalk. It wouldn't be very hard to make one of these.

[edit] Sorry, I missed the your text in (). The hole would just need a little lapping or machined at a 45 degree angle to get it to fit smoothly

elf
Posts: 1416
Joined: Sun Nov 18, 2007 12:10 pm

Post by elf »

Or, how about one of these?

[edit] This link is probably better to use:
http://cgi.ebay.com/Magnet-building-toy ... 286.c0.m14
Last edited by elf on Tue Sep 22, 2009 11:03 pm, edited 1 time in total.

Charles Krebs
Posts: 5865
Joined: Tue Aug 01, 2006 8:02 pm
Location: Issaquah, WA USA
Contact:

Post by Charles Krebs »

Elf,

I was thinking in terms of a smaller diameter platform on top, with the spherical magnet fastened on top of the "base"platform (or just slightly embedded). Seems you could get to a much greater tilt angle without too much trouble. Put the magnet on a 1/4 inch high pedestal and 90 degrees or more should be doable. (And put a 1/4-20 hole in the base as well for additional versatility)


PS... just looked at the Bioquip catalog after re-reading Genes post above. The second "stand" is right along these lines, but looks like it could use a little "beefing up" and better finish:
http://www.bioquip.com/Search/DispProduct.asp?pid=6186

elf
Posts: 1416
Joined: Sun Nov 18, 2007 12:10 pm

Post by elf »

How's this? 1.5" diameter stage shown at 90 degrees on a .75" radius spherical magnet:

Image

Post Reply Previous topicNext topic