Magnetically captured debris from a diamond wheel knife sharpener

Images taken in a controlled environment or with a posed subject. All subject types.

Moderators: rjlittlefield, ChrisR, Chris S., Pau

rjlittlefield
Site Admin
Posts: 23596
Joined: Tue Aug 01, 2006 8:34 am
Location: Richland, Washington State, USA
Contact:

Magnetically captured debris from a diamond wheel knife sharpener

Post by rjlittlefield »

My Trizor XV knife sharpener has a magnet in its base, to capture metal debris that its diamond wheels grind off the knives that are being sharpened.

Periodically the magnet is supposed to be removed and cleaned. Every time I remove it, I have been intrigued by the large-scale patterns that have formed around the magnet. This time I decided to spend some time photographing them.

Starting with wide angle and working closer, all images are crossed-eye stereo pairs.

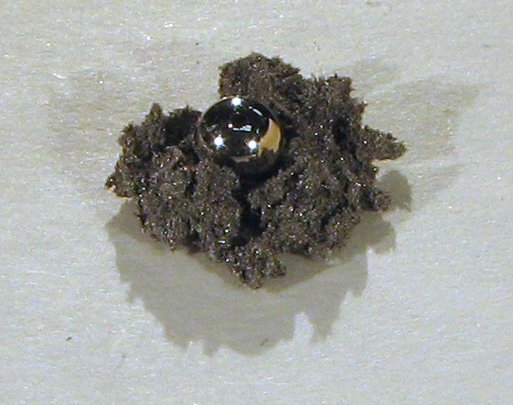
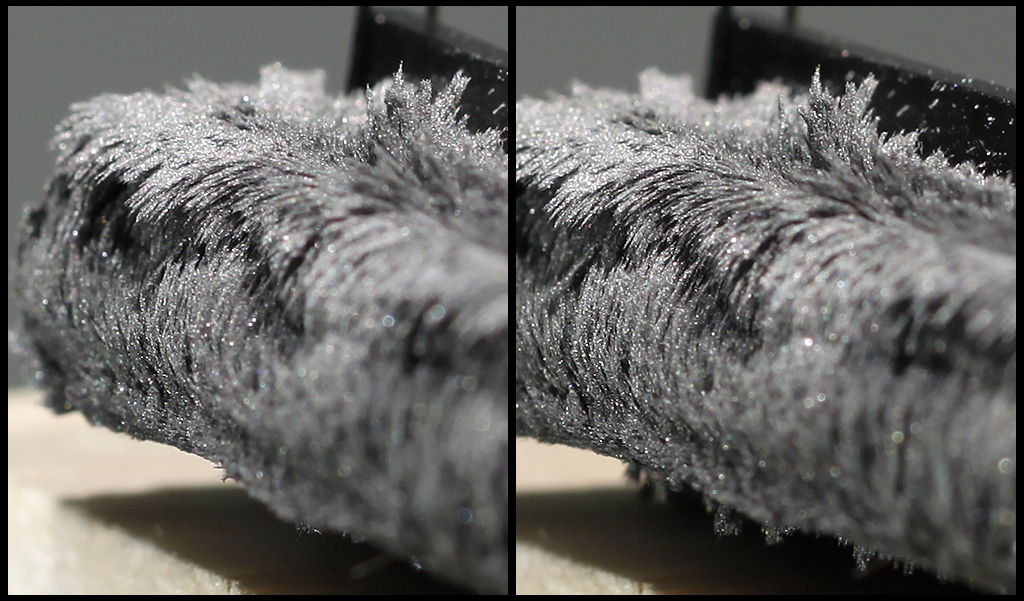
First we have the whole magnet. You can immediately see how the debris organizes itself into strings of particles that follow the field lines of the magnet. The pattern of those lines may seem odd, until you realize that the debris catcher is just an oddly proportioned bar magnet. The "ends" of the bar magnet, its north and south poles, are very close together, on the top and bottom surfaces in this photo. The long dimension of this magnet would be the width of a conventional bar magnet. So, the lines of force have the pattern shown at http://hyperphysics.phy-astr.gsu.edu/hbase/magnetic/elemag.html , forming a sort of cylindrical shield around the front of this magnet, and diving almost vertically into the top and bottom.

Image

Image


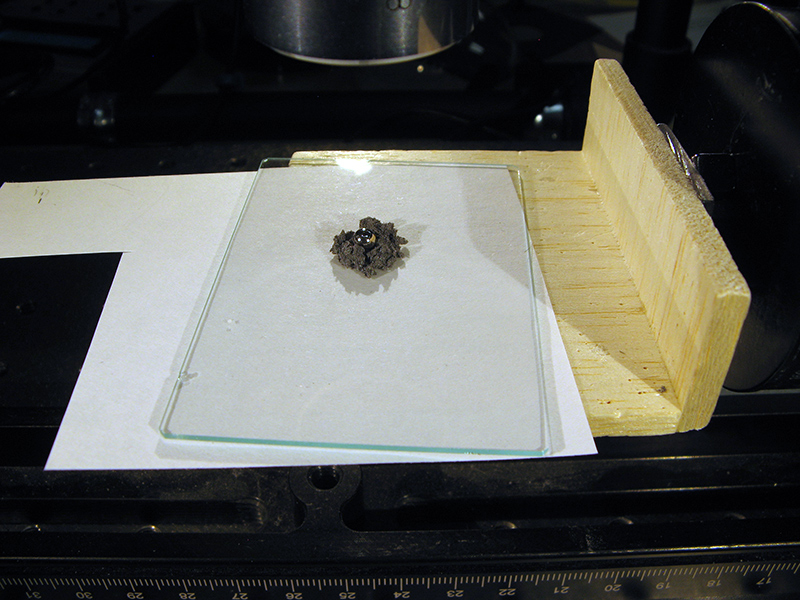
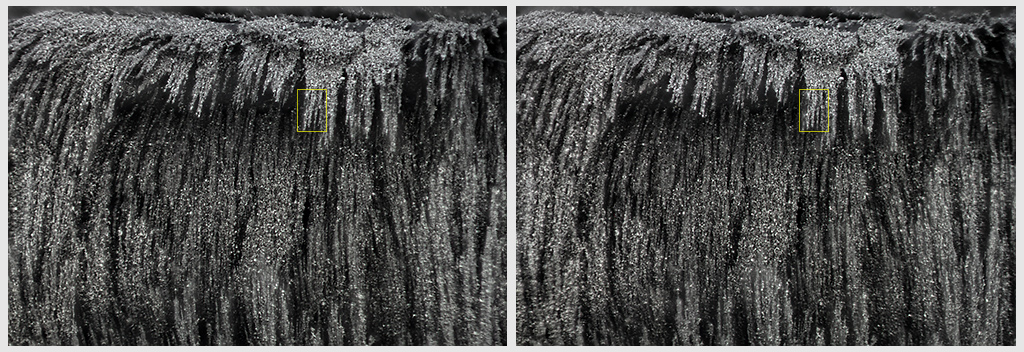
This is a view straight into the long face of the magnet. I've marked the small area where we'll look much closer.

Image


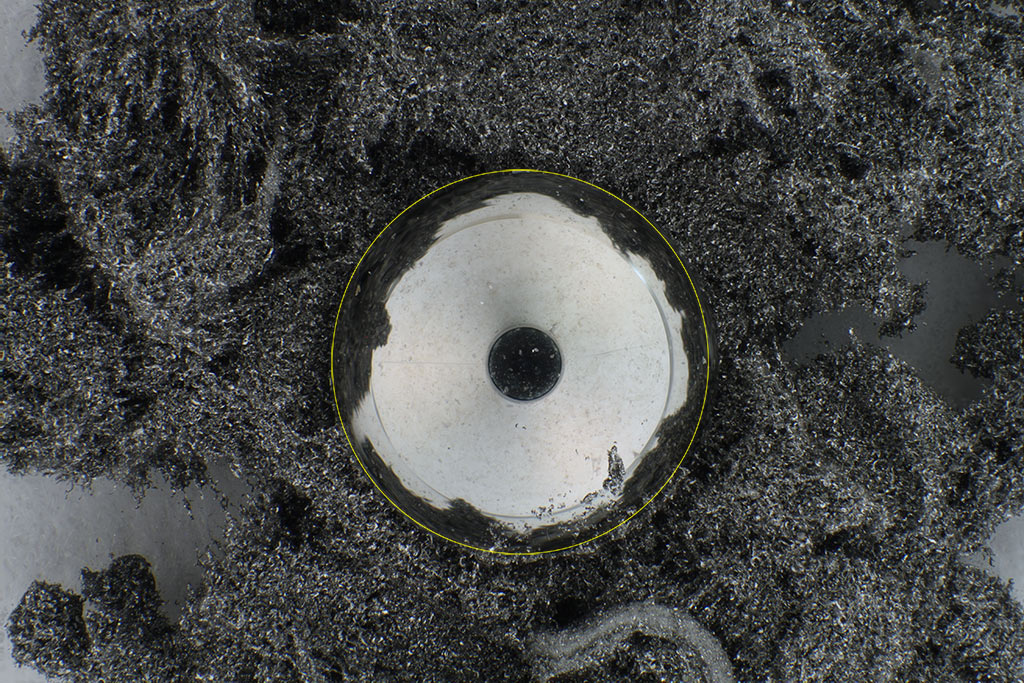
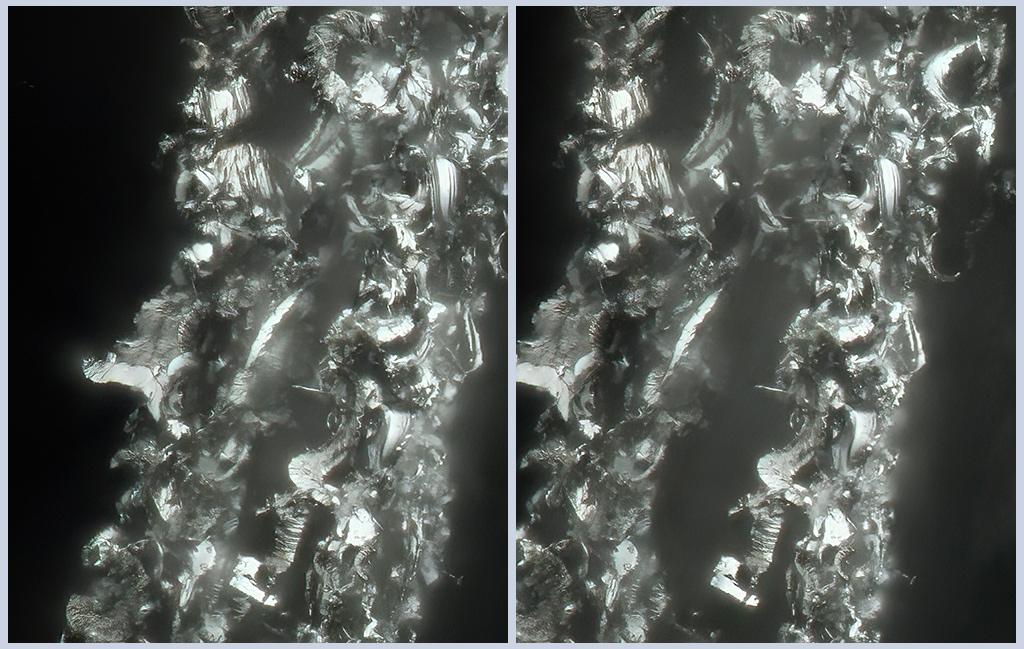
Here we can start to see details of the debris. Stereo helps a lot, if you can see that.

Image


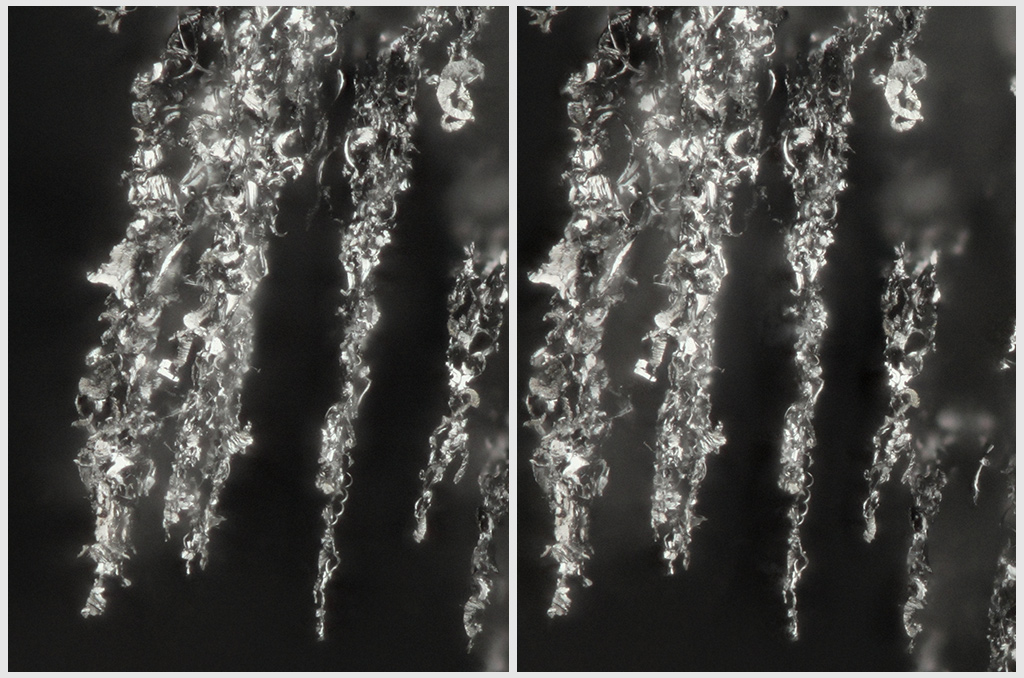
Cropping in even closer, we can see that the debris takes the form of flat shavings and even some long thin curls.

Image

Image

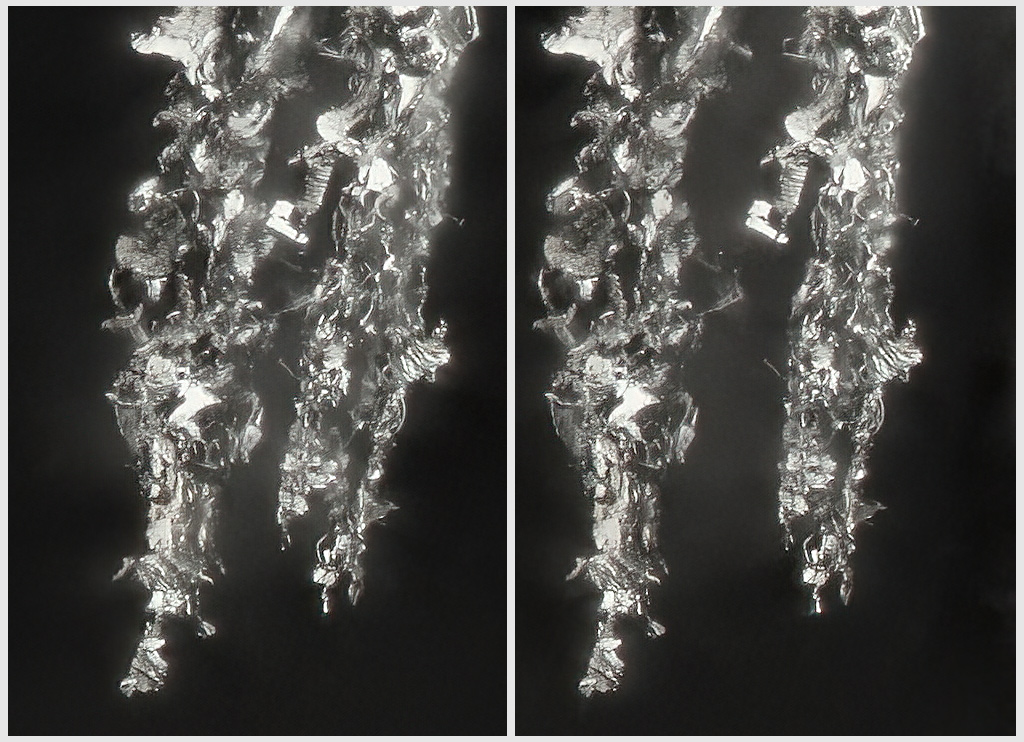
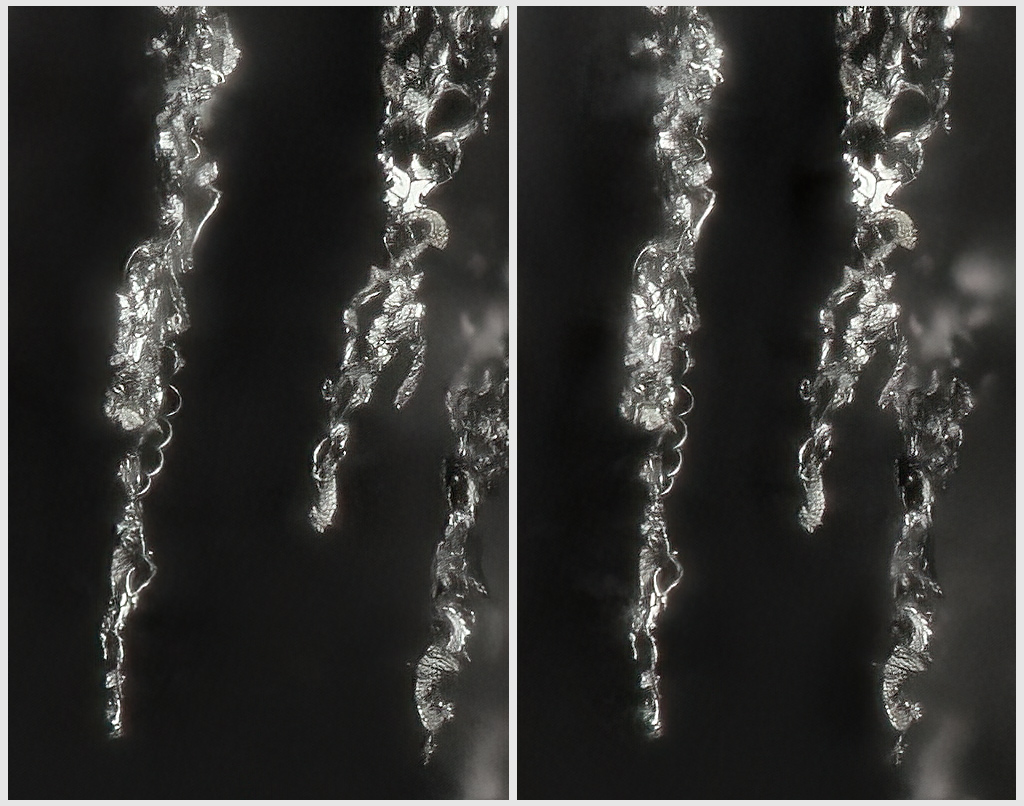
These particle shapes are not even close to the compact sand-like grains that I was implicitly expecting to see. I say "implicitly expecting" because I do not recall any explicit expectations, but I definitely recall being surprised by what I saw. In retrospect, these shavings and curls are "exactly what you'd expect" from very hard sharp edges being scraped across fairly ductile stainless steel, assuming of course that you've had the appropriate experience and made the connection properly. I've worked a fair bit with metal and know how it behaves at larger scales, but somehow I missed the now obvious connection to smaller scales.

That said, it turns out that the connection to smaller scales is in fact not so obvious, or at least not so consistent, even though sharpening processes have been studied intensively for many years. For those interested in such things, I will only point to the discussion at https://scienceofsharp.com/2015/03/01/the-diamond-plate-progression/ . Copying relevant snippets from near its beginning...
In The Honing Progression entry, an example of apex geometry refinement during honing with Shapton glass stones was presented. A slow, but linear improvement in sharpness and keenness was observed, consistent with the intuitive view that reducing abrasive size (increasing grit) leads to a sharper, keener and more linear edge, along with a more polished bevel. In the current discussion, examples taken from honing on diamond plates will show that the reality can be more complex.
...
A set of 4 diamond plates were used for this experiment; DMT coarse (325), fine (600), extra-fine (1200) and extra-extra-fine (8000).
...
Comparing side view images, all at 5000x magnification, shows that the roughness of the bevel actually increases with grit, rather than decreases as was observed with the Shapton water stones. The scratches are wider and shallower on the lowest grit hones, becoming progressively deeper with increasing grit.
Studying the sharpening process would be a fun rabbit hole to dive down, but this exercise has already taken far too much time, most of it struggling to get decent illumination for this stuff that looks dark gray at low mag but at high mag resolves to be a bunch of mirror surfaces at extreme angles and small scales. The results shown here took more diffusion and more fiddling than I have ever had to use with even the shiniest insect. In the end I simply gave up on the three 20X stacks that I shot, and backed off to the 10X which provides a little wider range of available angles for illumination.

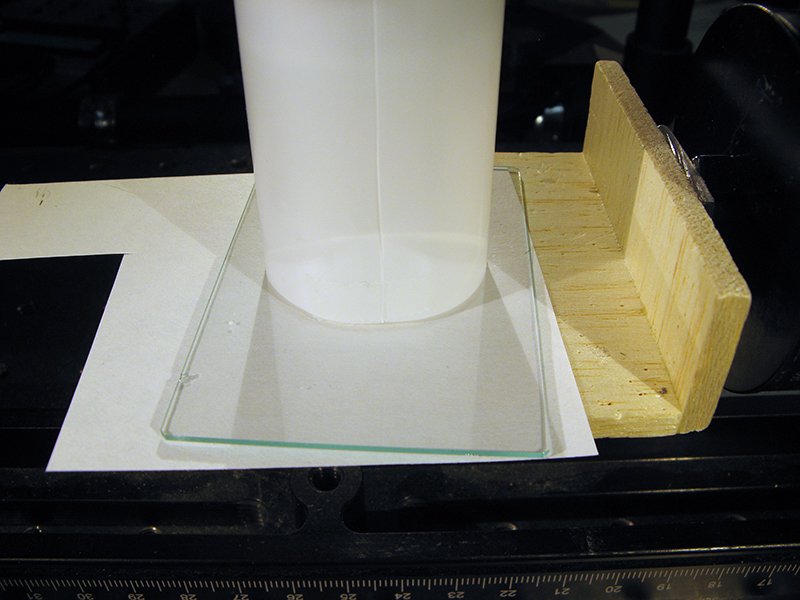
Images #1 and #2 with Canon EF 100mm f/2.8L Macro IS USM at f/16 and f/5.6, single focus point using cha-cha stereo, 3 undiffused Jansjo lamps. Image #3 with SK Componon-S 50/2.8 at 12.3 mm field width, wide open, focus step 0.04 mm, hemispherical diffuser plus Kleenex over the back, 4 Jansjo lights evenly distributed, ISO 100 at 1/15 second. Images #4 through #6 with Mitutoyo M Plan Apo 10X on Raynox 150 at infinity focus, 0.007 mm focus step; diffuser from LED tube light, plus Kleenex tissue over top for more diffusion and reduced brightness. Three flashes positioned at roughly 11, 1, and 7 o’clock, flag added to eliminate one nasty streak where the subject saw a bit of flash directly. ISO 100 at 0.5 seconds with 2nd curtain flash, 1/32 power on the flashes. Canon 580 EX II and Yongnuo YN 460-II.

All of the synthetic stereo pairs are +-3 degrees, using larger than normal focus step to avoid horizontal streaking. The 1.8X series was particularly extreme; it was shot at 0.04 mm focus step based on calculated DOF of 0.045 mm, but then stacked every 5th frame so effectively 0.2 mm focus step. I suspect that the mirror-like quality of these particles produces larger than normal DOF, due to utilized-aperture effects, despite the very diffuse illumination. At any rate the stereos looked better with large focus steps than small.

--Rik

Edit: add details regarding stacking the 1.8X series.

lothman
Posts: 965
Joined: Sat Feb 14, 2009 7:00 am
Location: Stuttgart/Germany

Re: Magnetically captured debris from a diamond wheel knife sharpener

Post by lothman »

rjlittlefield wrote:
Thu Jul 28, 2022 8:16 pm
For those interested in such things, I will only point to the discussion at https://scienceofsharp.com/2015/03/01/the-diamond-plate-progression/ .
Rik thanks for this link, the SEM pictures are stunning also the FIB preparation. I tied that such things myself and failed totally in comparison to the samples shown in your link.

Just a little off topic. For woodworking I came across of the technique of sharpening a scraper like shown here: https://www.youtube.com/watch?v=kPy7x1cXGo0

I used a polished 6 mm diameter tungsten bar as a burnisher. This also work on kitchen knives with only light pressure to errect the burr after grinding and probably due to plastic deformation smoothen it. So from now on I have such a tungsten burnisher in my kitchen drawer.

J_Rogers
Posts: 87
Joined: Mon Aug 09, 2021 2:29 pm
Location: North Carolina, USA

Re: Magnetically captured debris from a diamond wheel knife sharpener

Post by J_Rogers »

This is actually a really fascinating subject to photograph! It looks like a metallic version of a frozen waterfall / ice cave.

As I am sure lighting was a real chore, I have to ask, what would you say the ideal method for metallic objects like this would be? Coaxial would be my first guess, but I doubt there is an obvious benefit with the number of possible surfaces to reflect on. You mentioned streaking when computing the stack. Would compositing three different exposures into an "HDR" image mitigate this?

colohank
Posts: 113
Joined: Sat Jul 24, 2021 6:07 pm
Location: Fruita, Colorado, USA

Re: Magnetically captured debris from a diamond wheel knife sharpener

Post by colohank »

Specular highlights on reflective metallic surfaces are probably inevitable, but they can be greatly minimized by illuminating with diffused or reflected light -- the larger the apparent source, the better. Soft-boxes or a light tent would be ideal.

rjlittlefield
Site Admin
Posts: 23596
Joined: Tue Aug 01, 2006 8:34 am
Location: Richland, Washington State, USA
Contact:

Re: Magnetically captured debris from a diamond wheel knife sharpener

Post by rjlittlefield »

colohank wrote:
Sun Jul 31, 2022 7:28 am
Specular highlights on reflective metallic surfaces are probably inevitable, but they can be greatly minimized by illuminating with diffused or reflected light -- the larger the apparent source, the better. Soft-boxes or a light tent would be ideal.
Yes, that's very good general advice. It's why I used the diffusion setup that I described earlier, which would put most softboxes and light tents to shame.

But this debris material is rather more challenging than most, and I see that I have failed to adequately discuss that point.

So let's spend some time on that.

I'll begin by noting that the knife sharpening debris is just pieces of stainless steel, a material which when polished makes an excellent mirror.

For illustration, here I have dropped a polished sphere of stainless steel into a pile of the knife sharpening debris. This is being illuminated by three Jansjö lamps with no diffusion, producing crisp shadows and three extremely blown out specular highlights on the mirror ball.

Image

Now, I'm going to look down on this pile of stuff with a 2X Mitutoyo objective:

Image

But since I know that without some diffusion, I would get the same hard shadows and blown out highlights, I'm going to add some diffusion.

In fact, I'm going to add quite a lot of it, in the form of a cylinder of diffusing material that I harvested from the exterior of a tube-style LED lamp. This stuff is remarkable. When I hold a piece of it in front of my eye and look in the general direction of the sun, I can see no hint of exactly where the sun is. And while I have not measured it, I have to think that it has been designed to have an absorbance that is close to zero, since the only way light gets from the LEDs out into the room is to go through this stuff.

Here is what the diffuser looks like from the outside.

Image

With the diffuser in place, this is what the objective sees. I have drawn a yellow circle at the edge of the ball, to mark where that is.

Image

Now, for starters it should be clear in this view that the illumination has been diffused very well. The structure of the three Jansjö lamps has been reduced to nothing more than a slight undulation in brightness around the cylinder, as we would expect from cosine rule for light striking the diffuser at an angle.

In the center of the ball is the dreaded and unavoidable "black hole", which consists of the objective itself. The blackness is the interior of the camera, being seen through the objective and reflected back by the mirror ball. The few light specks in this area are pieces of sharpening debris that migrated in from the surroundings.

Midway between the "black hole" and the edge of the ball, there is a narrow ring of darkness. That ring is the slight gap between the cylindrical diffuser and the white paper base plate, formed by the piece of thin glass that is holding the debris and mirror ball.

And finally, between that ring and the edge of the ball, there is a lot of dark area. That dark area is a reflection of debris that surrounds the ball.

Going farther out, we have just debris, lots and lots of debris. The debris is easily distinguishable from the polished ball because (a) the debris is finely textured and (b) on average the debris is a lot darker than the polished ball is.

Let me say that again because it's important: on average, the debris is a lot darker than the polished ball is.

But why is that? After all, the debris is made of the same stuff as the polished ball, and it's sitting in the same illumination field, right? Why is it not the same average brightness?

The answer, skipping a lot of the details, is that in fact the individual pieces of debris are not sitting in the same illumination field as the mirror ball.

The mirror ball, or more precisely the large parts of it that look bright in this picture, are sitting in locations where they are illuminated directly by light from the diffuser, and are angled to reflect that light up into the objective. Along the edge of the mirror ball, the parts that look dark are sitting in locations where any light they would reflect into the objective is blocked by debris. In other words, in those areas we are seeing reflections of shadows.

The same thing is happening all over the debris "surface". Where pieces of debris stick up and are oriented properly, they reflect light from the diffuser into the objective and look bright. But if they are angled so as to reflect shadows, or sit low enough that they are shadowed themselves, then they look dark. There are a lot more ways to look dark than there are to look bright, and so on average the collection of debris looks dark.

If the debris gets squashed a little, then on average more of it sits close to the surface so the squashed part looks brighter. There is a band of debris like that in the photo, just right of center along the bottom edge. That band got a little packed together in one corner of the vial that I had kept this debris in, and when I poured out the pile, it stayed together.

Summarizing, stuff like the loose collection of debris around the magnet is tough to deal with because most of it is located at some position or tipped at some angle where it does not reflect light into the objective.

In an offline discussion with a friend while working with this stuff, I wrote that "The debris particles are essentially polished stainless steel, very small and individually very reflective. In aggregate they appear dark gray, but under high magnification they resolve into something approaching black and white, even under the most diffuse illumination I can create."

To show these issues more clearly, here is a small part of areas shown earlier, but at higher magnification through a Mitutoyo 20X NA 0.42 objective. This is better in stereo, but even as a flat image you can see how these pieces that in some sense "should" look bright and shiny, mostly do not because they are blocked from light that would cause that appearance.

Image

Summary: light tents are good, but loose debris is still difficult.

--Rik

rjlittlefield
Site Admin
Posts: 23596
Joined: Tue Aug 01, 2006 8:34 am
Location: Richland, Washington State, USA
Contact:

Re: Magnetically captured debris from a diamond wheel knife sharpener

Post by rjlittlefield »

J_Rogers wrote:
Sat Jul 30, 2022 9:34 am
This is actually a really fascinating subject to photograph! It looks like a metallic version of a frozen waterfall / ice cave.

As I am sure lighting was a real chore, I have to ask, what would you say the ideal method for metallic objects like this would be? Coaxial would be my first guess, but I doubt there is an obvious benefit with the number of possible surfaces to reflect on. You mentioned streaking when computing the stack. Would compositing three different exposures into an "HDR" image mitigate this?
To be honest, I have no idea how to light this stuff well.

In comparison to a frozen waterfall or ice cave, this stuff is different because it's opaque. With frozen water, the light bounces around so that even things deep in the structure can have light shining back out through them. Not so with stainless steel.

When I was first starting to play with this problem, I really wished I had that SEM I dream of. Then it occurred to me that even an SEM might not work very well in the vicinity of a strong magnet. (That idea could be wrong, but I'm clinging to it anyway as a method of consoling myself. "Sniffle...want SEM...sniffle..." Yeah, that approach never worked for my kids either.)

As for compositing three different exposures, I am not optimistic that would help much, but I'm not sure how to explain why that is. Maybe at some point I'll just try it and see. Of course that task has to compete for time with a lot of others, so I'm guessing I won't get around to it. But I would welcome hearing from somebody else how well it worked for them!

--Rik

rjlittlefield
Site Admin
Posts: 23596
Joined: Tue Aug 01, 2006 8:34 am
Location: Richland, Washington State, USA
Contact:

Re: Magnetically captured debris from a diamond wheel knife sharpener

Post by rjlittlefield »

lothman wrote:
Sat Jul 30, 2022 2:48 am
Just a little off topic. For woodworking I came across of the technique of sharpening a scraper like shown here: https://www.youtube.com/watch?v=kPy7x1cXGo0

I used a polished 6 mm diameter tungsten bar as a burnisher. This also work on kitchen knives with only light pressure to errect the burr after grinding and probably due to plastic deformation smoothen it. So from now on I have such a tungsten burnisher in my kitchen drawer.
A little off topic, but I welcome the information anyway.

On a related topic, do you know of high mag imagery that shows the effect of honing a kitchen knife with a sharpening steel, for example as shown at https://www.youtube.com/watch?v=EKYPCxx20zg ?

For the scraper as shown in the video that you linked, it seems completely clear to me how the burnisher forms the cutting edge.

But for the honing steel, I do not have a good feel for what the operation is doing. In particularly it is not clear to me why the hone is essentially stroked across the cutting edge in the direction from edge to body, rather than body to edge. Intuitively, it seems that body-to-edge would do a better job of "realigning the teeth", but the instructions are consistent to do it the other way.

--Rik

lothman
Posts: 965
Joined: Sat Feb 14, 2009 7:00 am
Location: Stuttgart/Germany

Re: Magnetically captured debris from a diamond wheel knife sharpener

Post by lothman »

rjlittlefield wrote:
Thu Aug 04, 2022 10:29 pm

A little off topic, but I welcome the information anyway.

On a related topic, do you know of high mag imagery that shows the effect of honing a kitchen knife with a sharpening steel, for example as shown at https://www.youtube.com/watch?v=EKYPCxx20zg ?

For the scraper as shown in the video that you linked, it seems completely clear to me how the burnisher forms the cutting edge.

But for the honing steel, I do not have a good feel for what the operation is doing. In particularly it is not clear to me why the hone is essentially stroked across the cutting edge in the direction from edge to body, rather than body to edge. Intuitively, it seems that body-to-edge would do a better job of "realigning the teeth", but the instructions are consistent to do it the other way.

--Rik
again not macrography-related {-X :D
most of the honing steels ar serrated like a file and the cut material off the blade. You can see chips when you press the knife strong enough and have a still sharp honing steel. In order not to achieve a long (=instable/floppy) burr torn out, you should work against the cutting edge.
The effect of a burnisher is another. With the polished burnisher (there are also polished "honing" steels) you can re-erect a bent burr and get it cut again without loss of blade material.

Of course this only works at slightly dull knifes, if they show already a blunt (reflecting) cutting edge you have to grind them. That's the reason why cooks use the honing steel very often just to reshape the cutting edge before each use.

You often read you should not put your knife in the dishwasher, and it is true that a sharp knife no longer cuts as good when have been in the dishwasher. I believe that in the dishwasher there is a chemical attack on the very fine, but cutting burr on the cutting edge. So the burr is dull or etched away and no longer cuts. But even the a burnisher can do the job :wink:

Post Reply Previous topicNext topic