Hi all!
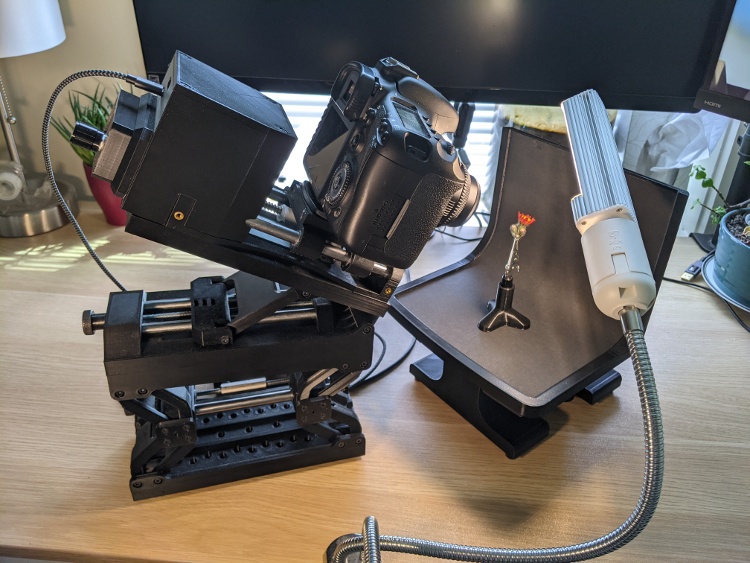
I became interested in macro photography thanks to this forum, and decided to try my hand at building my own setup. It is less fancy than most of the ones here, but I had fun building it and it takes pretty pictures occasionally, so I figured I would share it for who is interested.
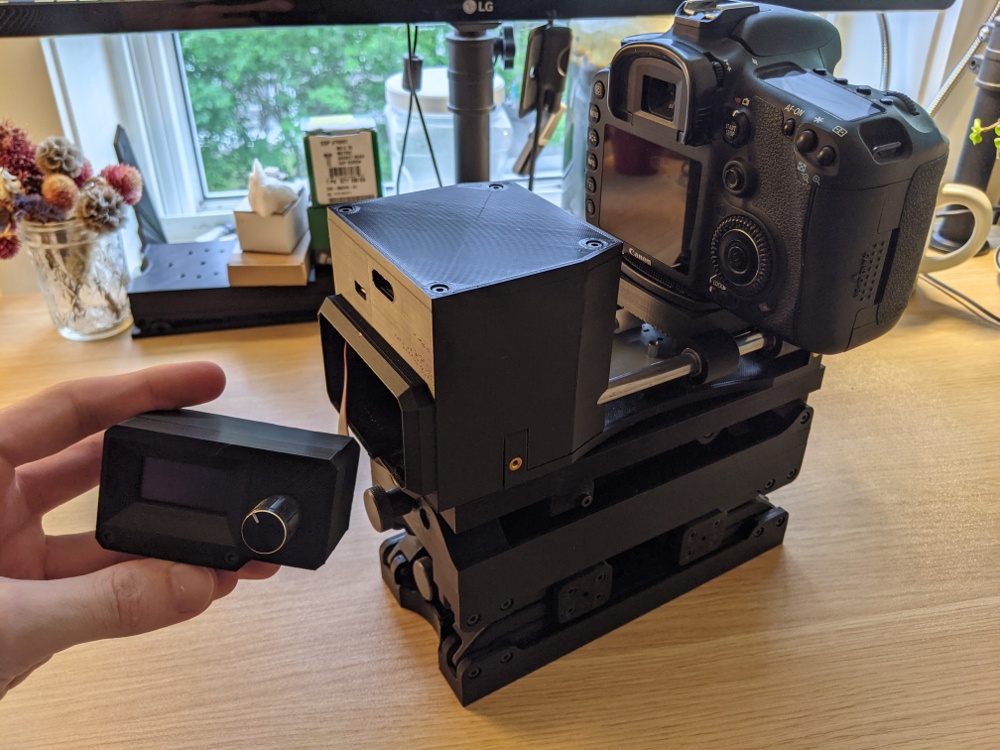
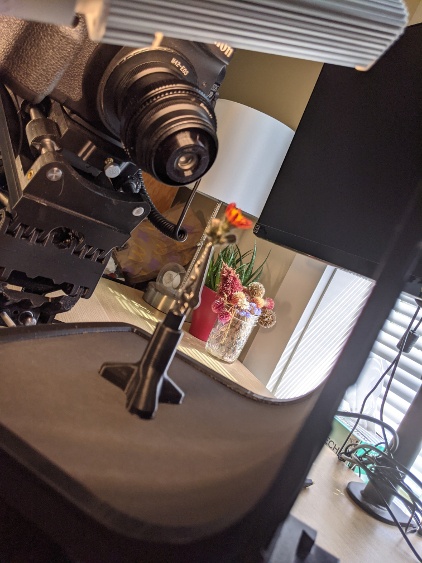
It consists of a stage with X/Y positioning (built around an old microscope stage) for the sample, and an electronically controlled focus rail on top of adjustable height and tilt blocks. The stage has replaceable backdrops and sample holders, held on by magnets.
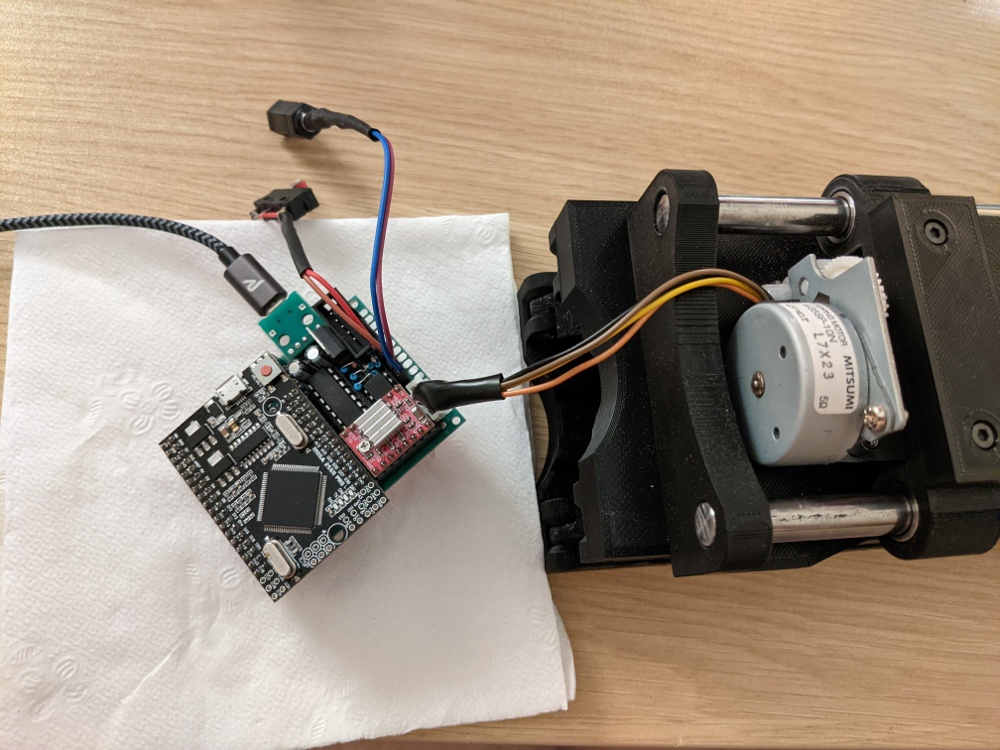
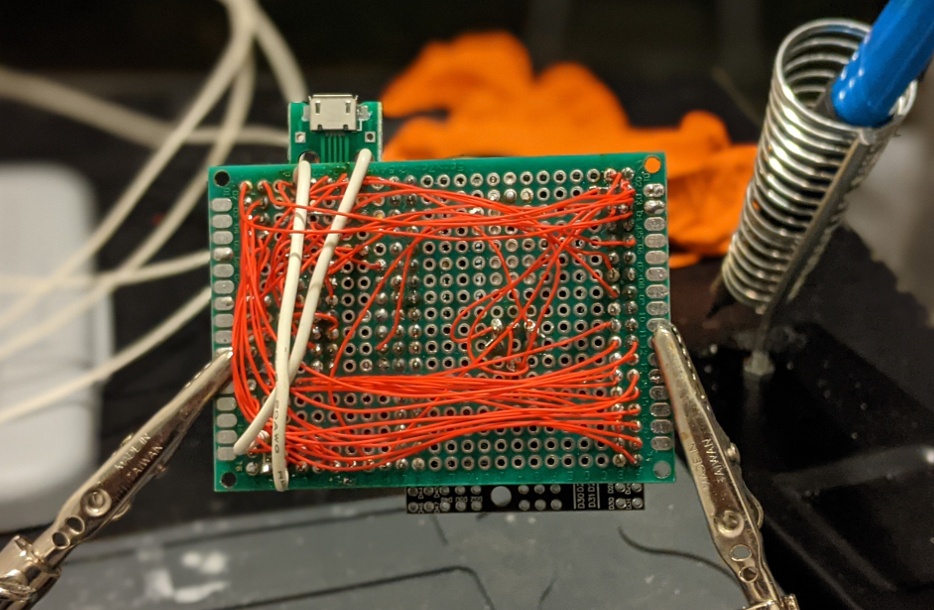
The design is primarily motivated by cost, and uses 3D printed parts wherever I could get away with it. Moving parts use cheap steel stock and aluminum bushings.
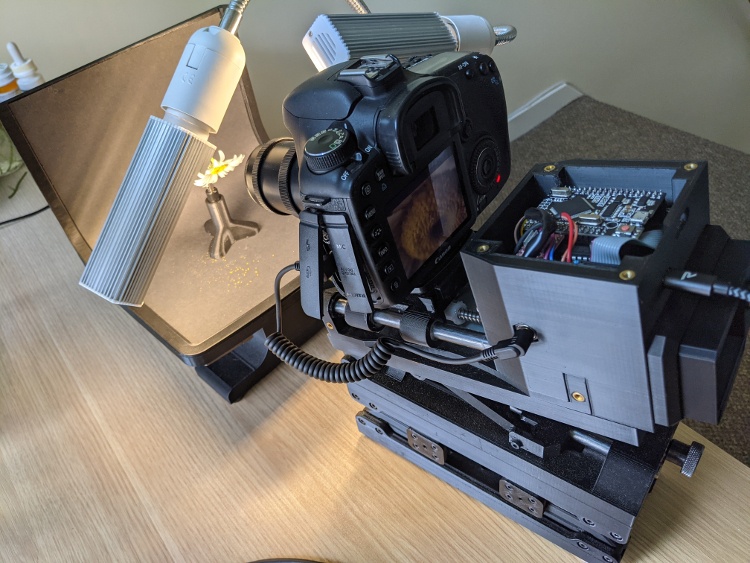
The macro lens is built around an old scanner lens; initially I used a Primefilm 3650 (which I found thanks to Robert O'Toole), and later switched to a better lens found by scouring ancient scanner reviews. I use a 3D printed lens holder, clamped into M42 extension tubes.
Cost of the total setup (including electronics and lens) is around $150, and ended up being very affordable.
I'm sure they don't hold water to some of the fancier setups here, but I'm pleased with some of the images I get. Decent sharpness, down to the hairs - the world is fascinating at the small scales!
A mostly 3D printed macro setup
Moderators: rjlittlefield, ChrisR, Chris S., Pau
-
- Posts: 1636
- Joined: Sat Apr 14, 2018 10:26 am
Re: A mostly 3D printed macro setup
That's quite an impressive setup! Looks like it should be very nice to use.
What scanner lens did you end up using?
Re: A mostly 3D printed macro setup
Nice setup. Do you have some more info maybe on the electronically controlled focus rail?
Jacco
-
- Posts: 7
- Joined: Sun May 31, 2020 6:47 am
Re: A mostly 3D printed macro setup
I ended up using a CanoScan FS4000US. It has higher resolution and a larger aperture than the Primefilm 3650, and seems to have not yet been discovered by macro-folks, so I was able to pick up two broken scanners for $20 each. It's a nice (and cheap!) upgrade over the Primefilm.
In the interest of cost optimization I used the stepper/leadscrew assembly from the Primefilm 3650 to drive the focus rail. The weight of the camera is carried by two steel rails (with steel bushings - the cheapest Home Depot has to offer! cleans up nicely with hand polishing), and a 3D printed sled connects everything together. It includes a small flexure to clamp the camera plate in place.
As far as electronics go (photo below), the core is formed by an Arduino Mega 2560 (the big module on the left). It drives the motor via an A4988 stepper driver (the red module on the right), and triggers the camera via an optocoupler and a standard shutter release cable. One of my main goals was to have everything run off of a USB power bank to have access to cheap, high capacity power on the go. To run the power hungry 12V stepper, I decided to make use of the USB quick charge protocol. There is a second microcontroller (an ATTiny84 - the long black chip on the right) on board that turns on when power is first plugged in, and it negotiates 12V from USB. After power is established, the rest of the electronics are allowed to turn on and the focus rail is ready.
The rest of the wiring is just peripherals. There is a rotary encoder and a small OLED display for setting up the stacker. The display/switch are connected by a ribbon cable and are held onto the rail by magnets, so you can detach it if the rail is in an awkward location. There is also a microswitch so the rail can figure out where the sled is at startup.
The wiring is about at the limit of what is reasonable for hand soldering for me - in the future I might just have a PCB made for this:
As far as user experience goes, you plug in the power (just a USB cable), set up the start/end point for the stack, the number of photos (or the spacing between each photo), various delays for allowing vibrations to settle between photos, and the rail is ready to go. It takes me around a minute to set things up, so it's less useful for moving subjects - luckily I mostly shoot plants.
Re: A mostly 3D printed macro setup
Interesting setup, I 3D printed a design on Thingiverse but being just a linear camera slide the subject placement can be a bit frustrating at times. I could do with a more flexible subject stand. I use the leds for positioning but use the diffused flash with a side reflector for fill in light, Arduino driven using the Stackduino design.
- Attachments
-
-