
This is how the lens arrived on the left.
You can see the full story on my site: https://www.closeuphotography.com/blog/ ... -trash-bin
First step was to remove the front and rear cells. These were really tight, they both took multiple attempts to get them loose.
Be sure to click on any image below for a larger version.
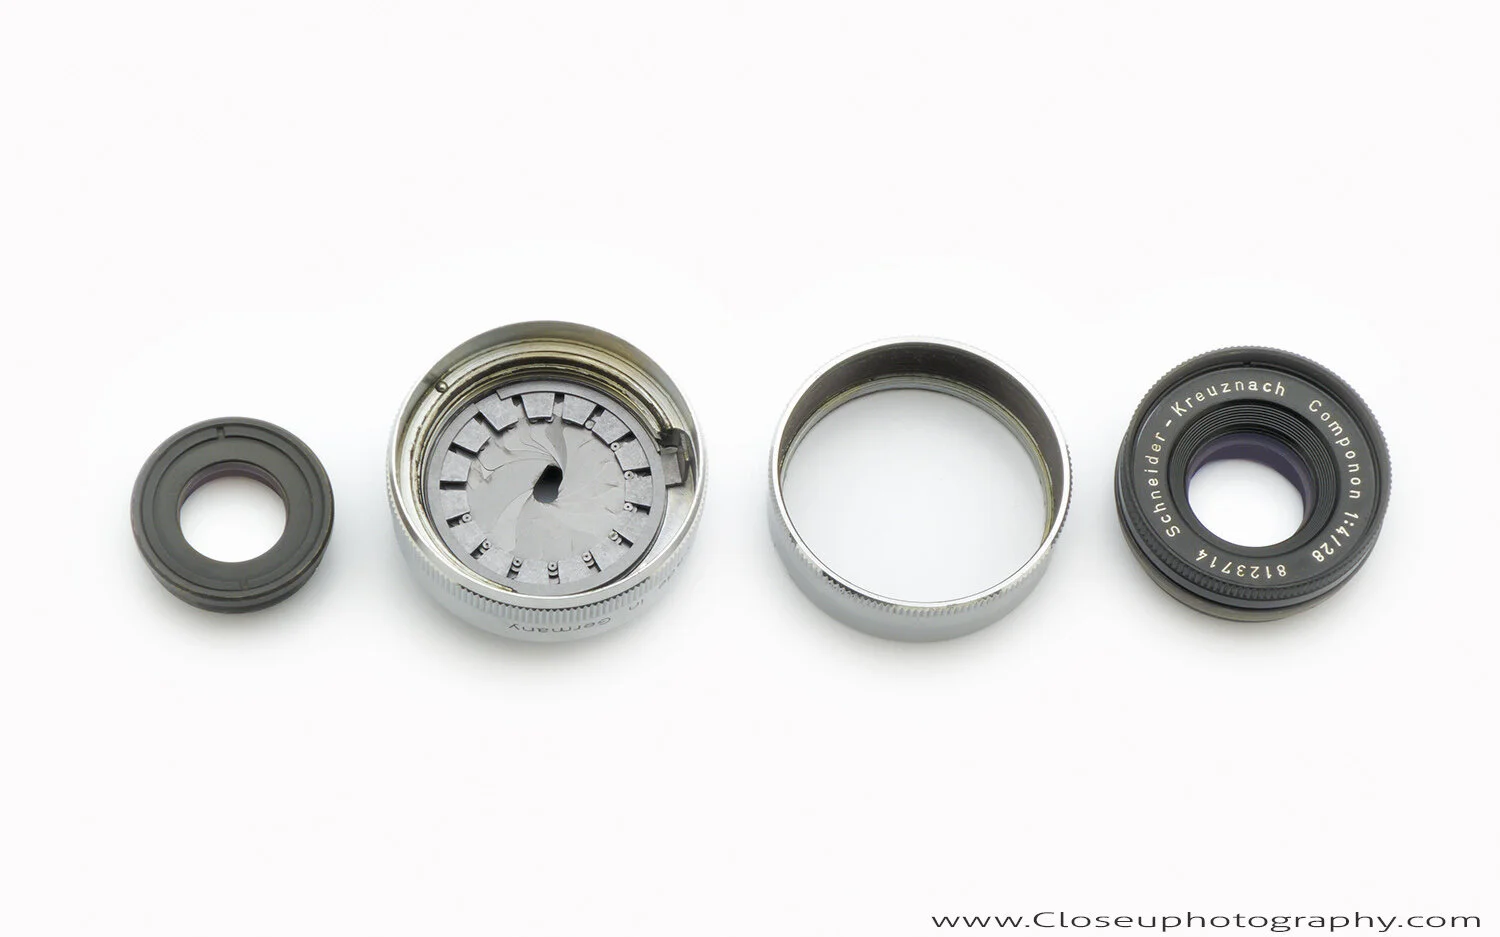
You can see the blades slipped out of the guide.
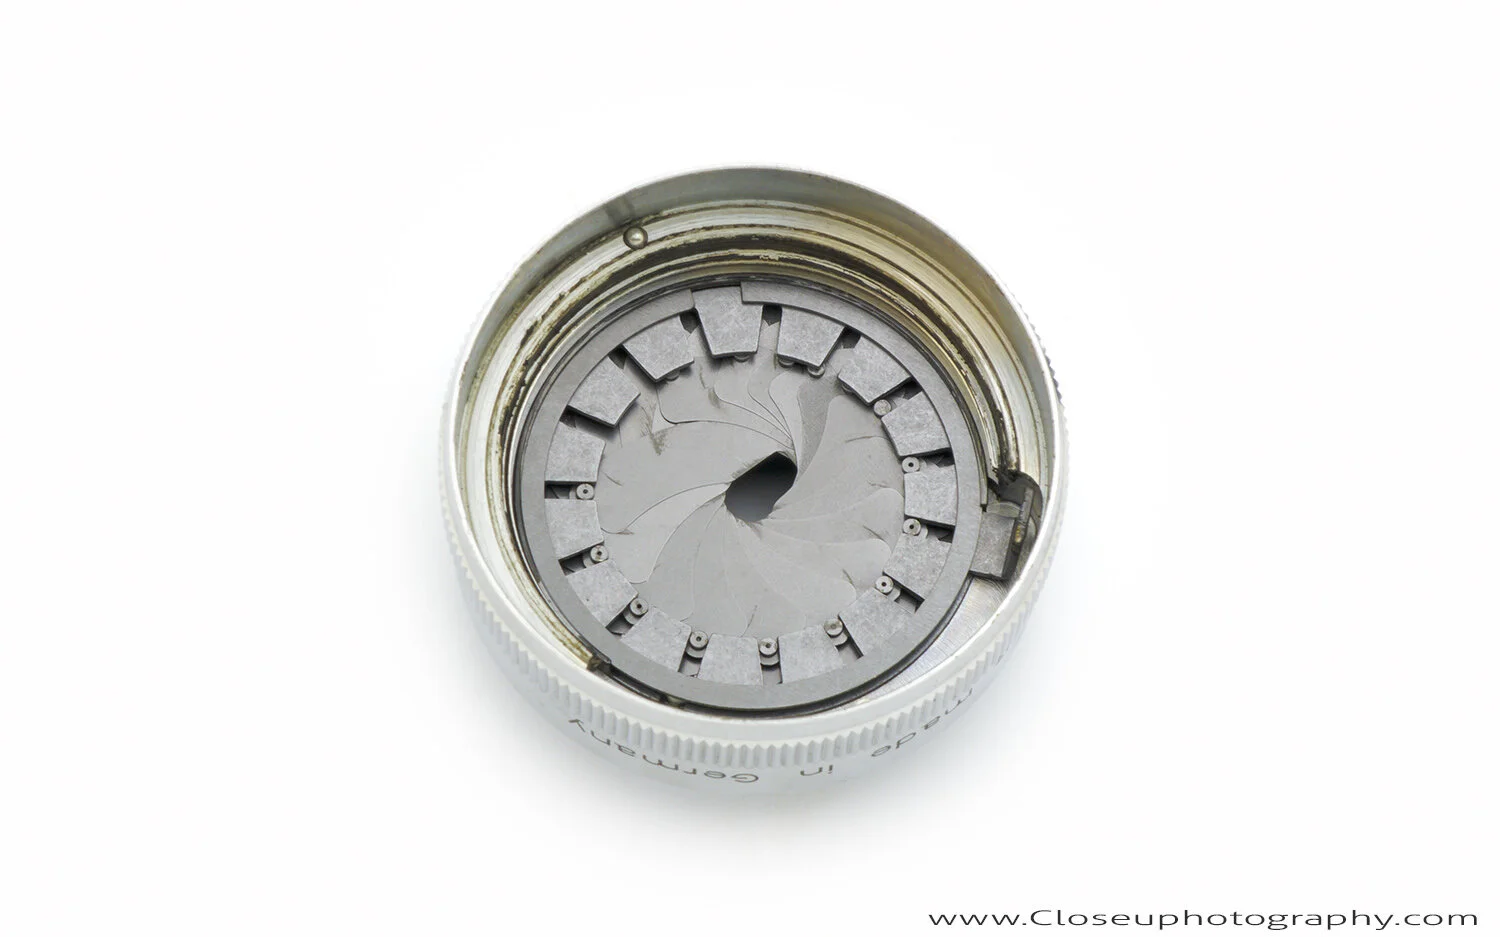
The blades were easy to push back into position with bent needle-nose pliers. Luckily none of the blades were damaged.
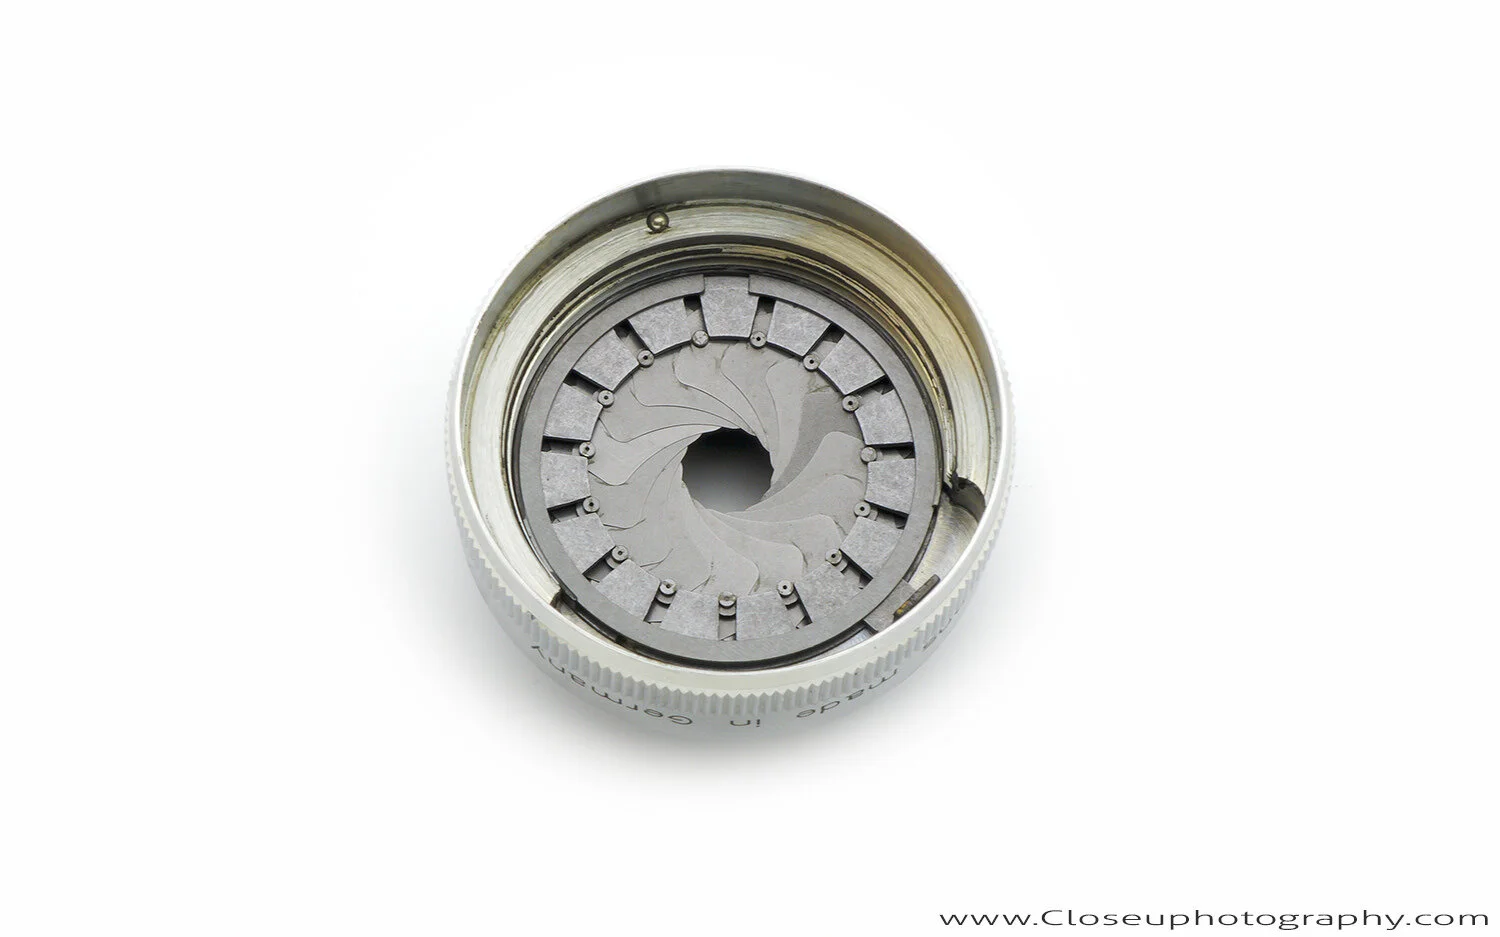
You can see the iris lever at 4 o'clock and the ball bearing for the f-stop detent at 11:30.
The original owner bought it in the 1960s and is now retiring from photography and clearing out all of his old equipment. I'm glad I was able to give the lens a new life and get it back to 100% working and usable condition.
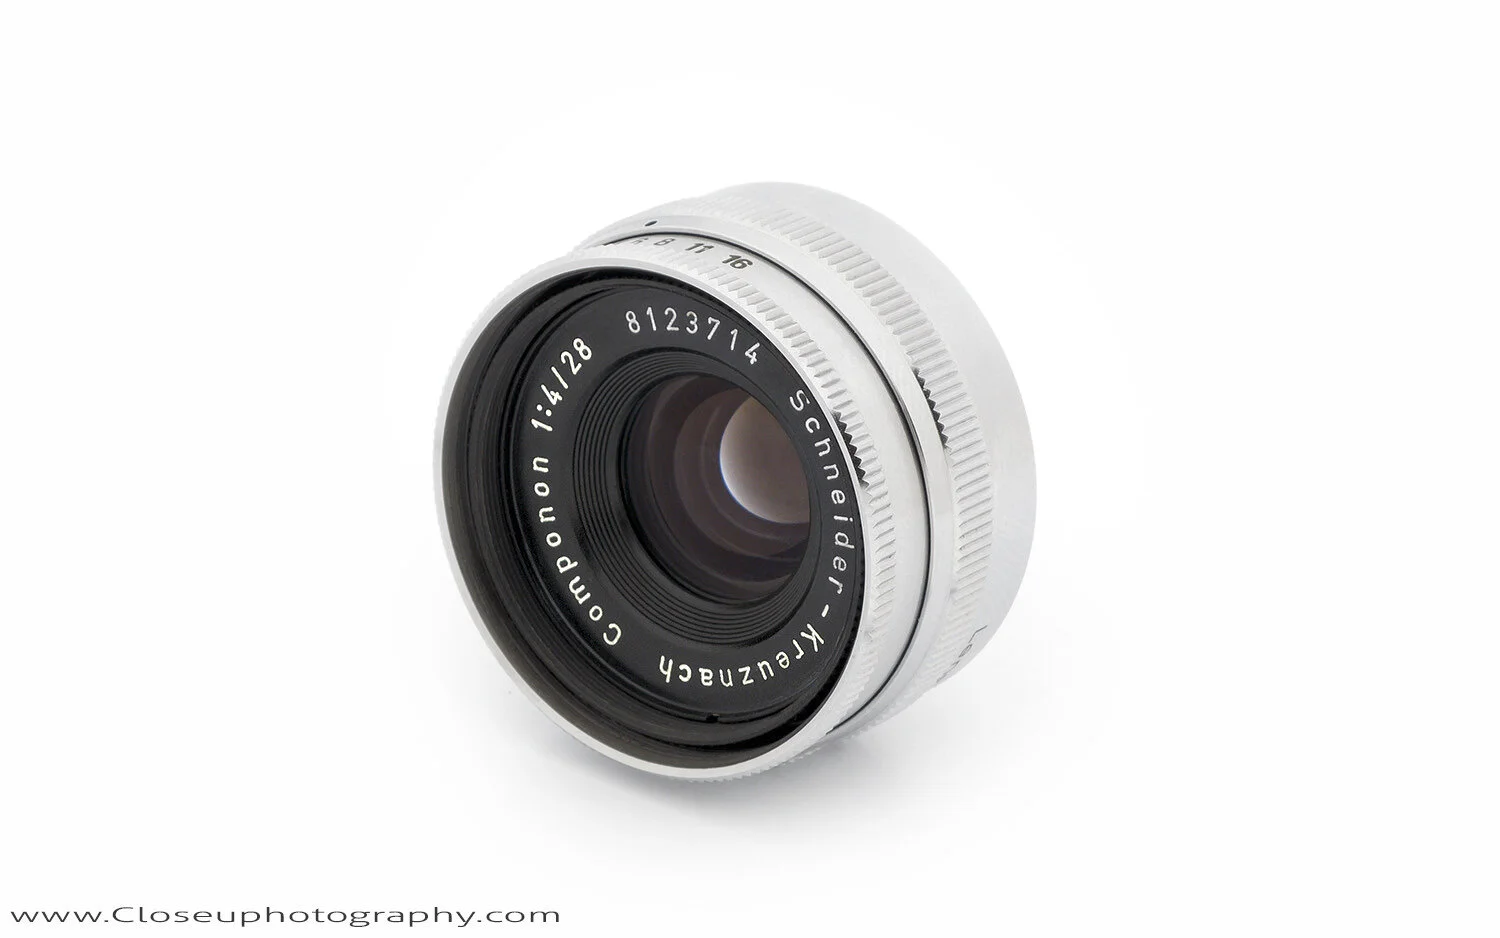
This is a very clean sample and now its back in 100% working shape!
Next step is to test sharpness.
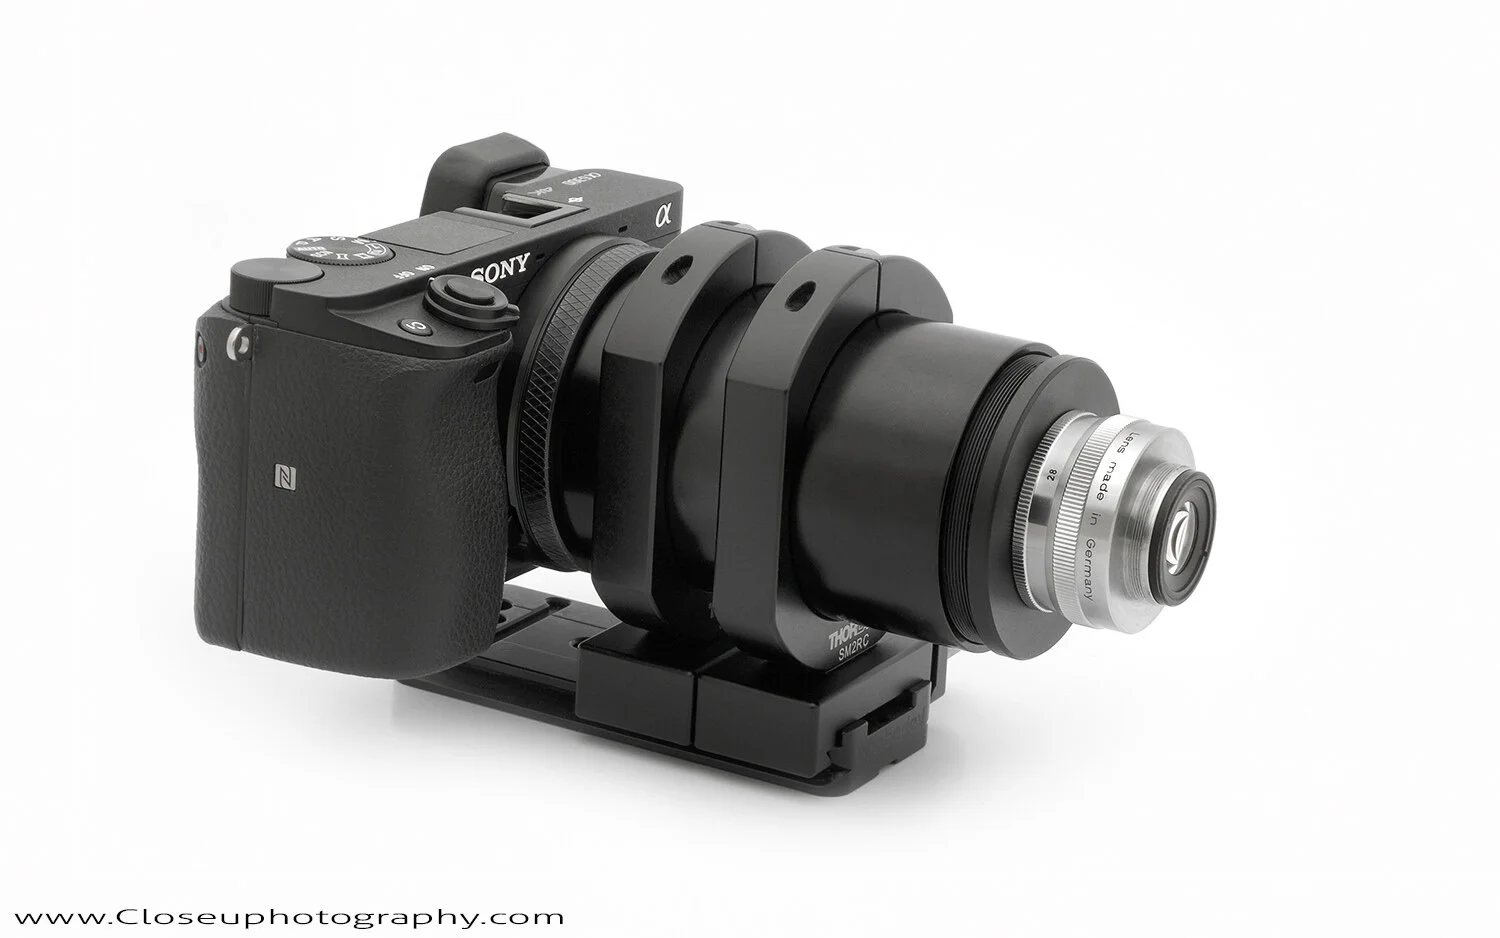
The lens mounted in my studio setup with a Mejiro 5.6/90, mounted inside the SM2/52mm lens tube.
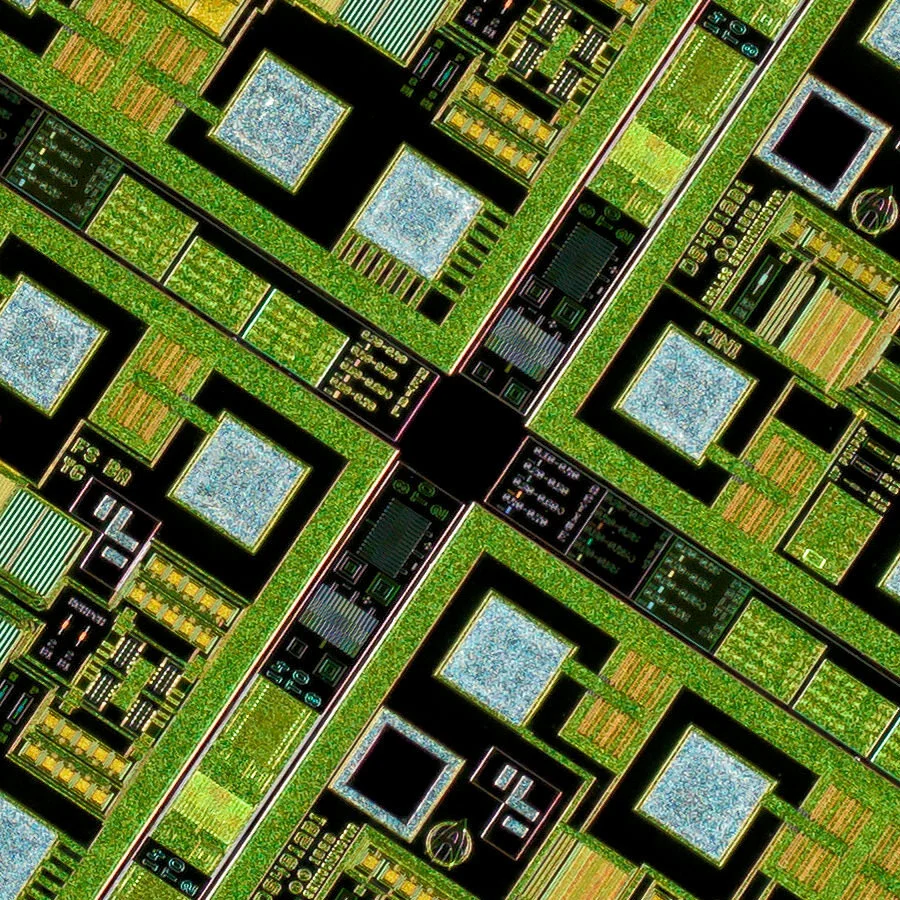
2500 pixel sample:

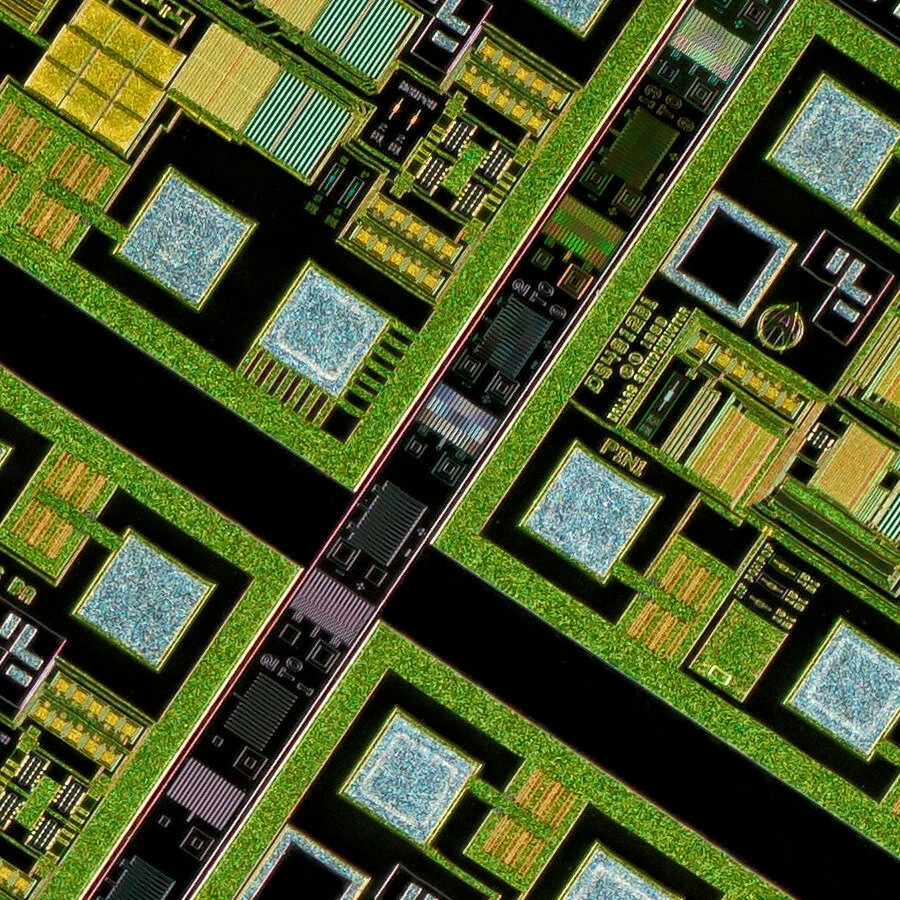
100% center crop
100% edge crop
100% far upper right corner crop
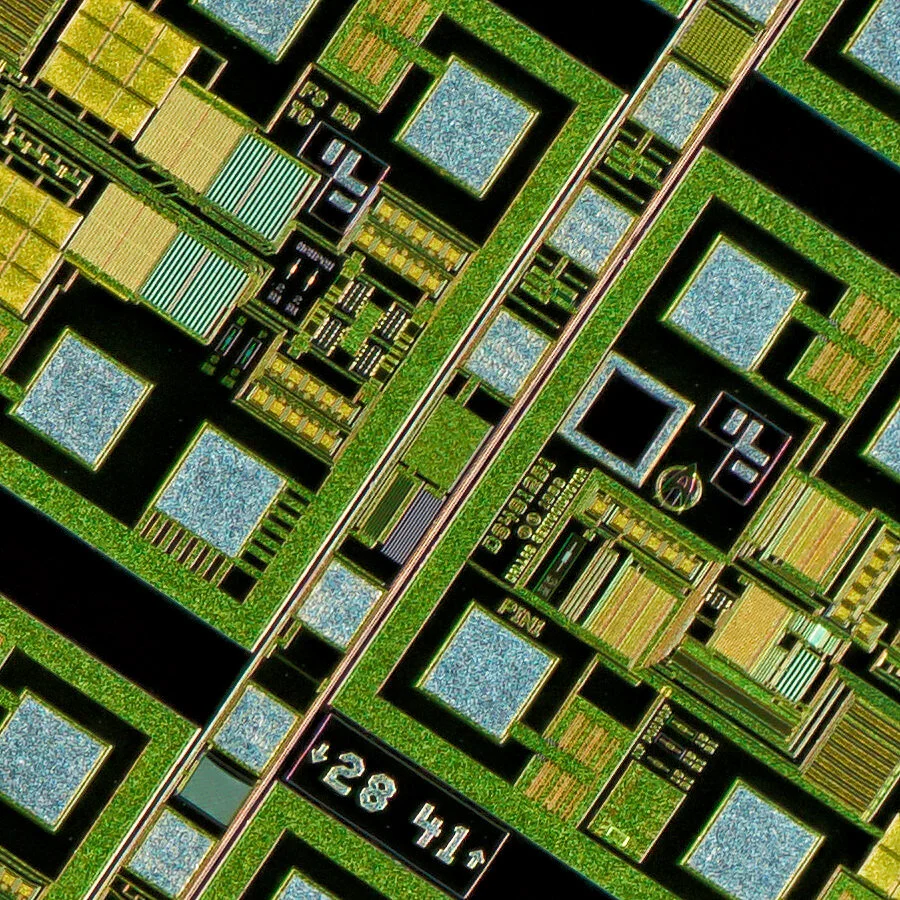
The files out of the rescued 4/28 are sharp and clean from the center to the very far edge of the corners at 3.2x!
Thanks for looking.
Any questions or comments, post them below!
Robert

