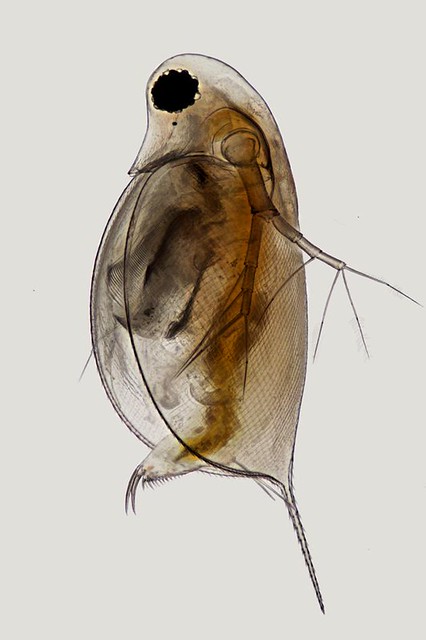
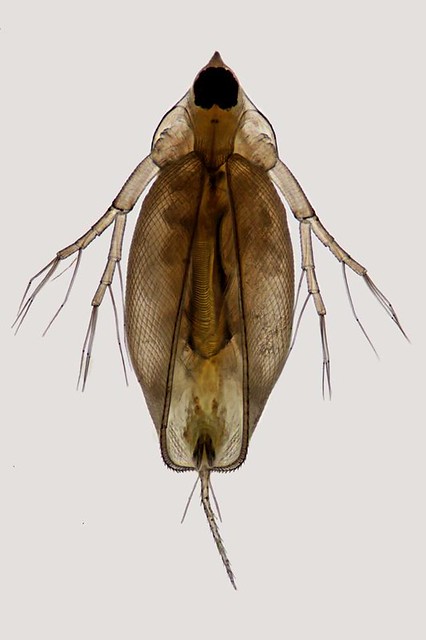
here I present two images of Daphnia with (simple) bright field ilumination. Both shots were made with an Olympus BHT stand equipped with a SPlan 4 and a NFK 2.5.
Lateral view:
Ventral view:
Regards
Christian
Moderators: rjlittlefield, ChrisR, Chris S., Pau

I have not, but I would like to know more. Is this a ring/square of melted beeswax applied to the glass or wax beads or something else?CEN wrote: I used a cover glass with beeswax spacers, .... A well known technique, I guess?