Modding a bellows - what step size is optimal for stacking

Just bought that first macro lens? Post here to get helpful feedback and answers to any questions you might have.

Moderators: rjlittlefield, ChrisR, Chris S., Pau

Joco
Posts: 29
Joined: Wed Dec 28, 2016 8:06 am
Location: Amsterdam
Contact:

Modding a bellows - what step size is optimal for stacking

Post by Joco »

Thanks for accepting me! I am a regular visitor to this forum for the wealth of information collected here - wonderful. In particular with regards to Zerene Stacker which I use and enjoy a lot.

So far I've used for stacking a 100mm macro on a macro rail and for some time now a Contax bellows with the matching Zeiss S-Planar 1:4 100mm. This bellows is very nice as it has 2 geared standards, but they are stiff and in general there is an annoying amount of play. At least partly age dependant no doubt.

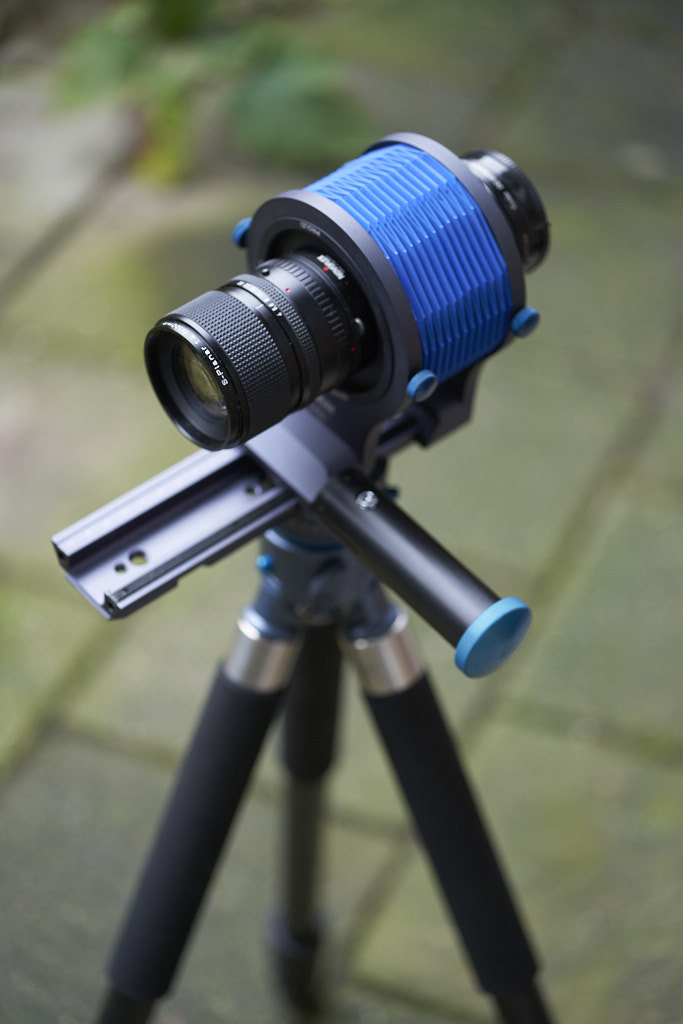
So I gave in and purchased a Novoflex Balpro 1 bellows. Not cheap, but it is a wonderful bit of kit, but only the front standard is geared. The rear is friction only (although the setup can be used in reverse).

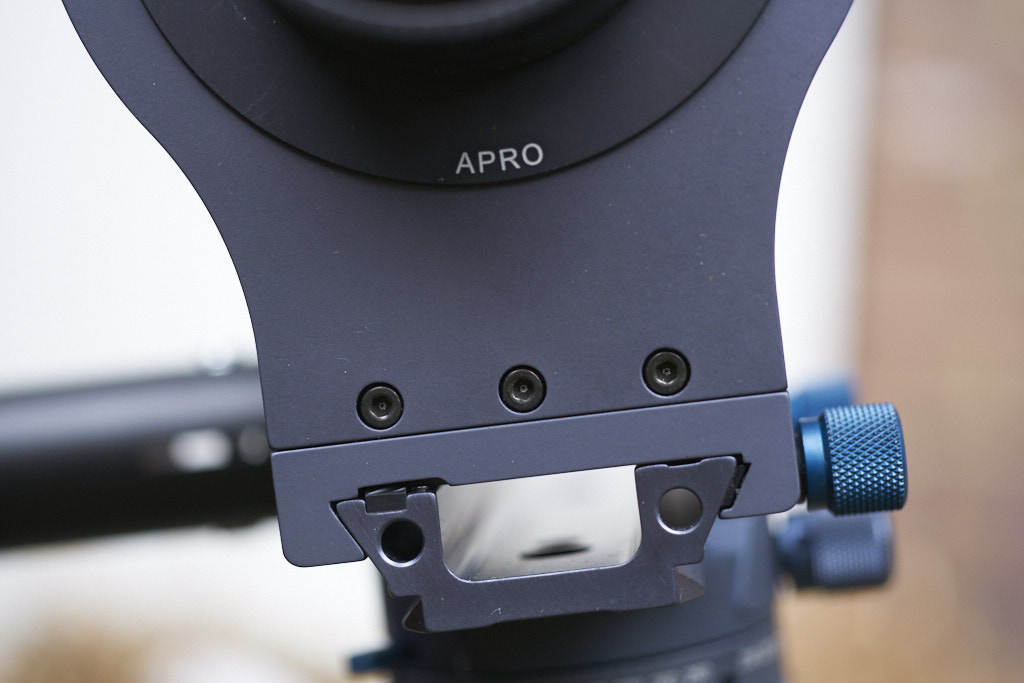
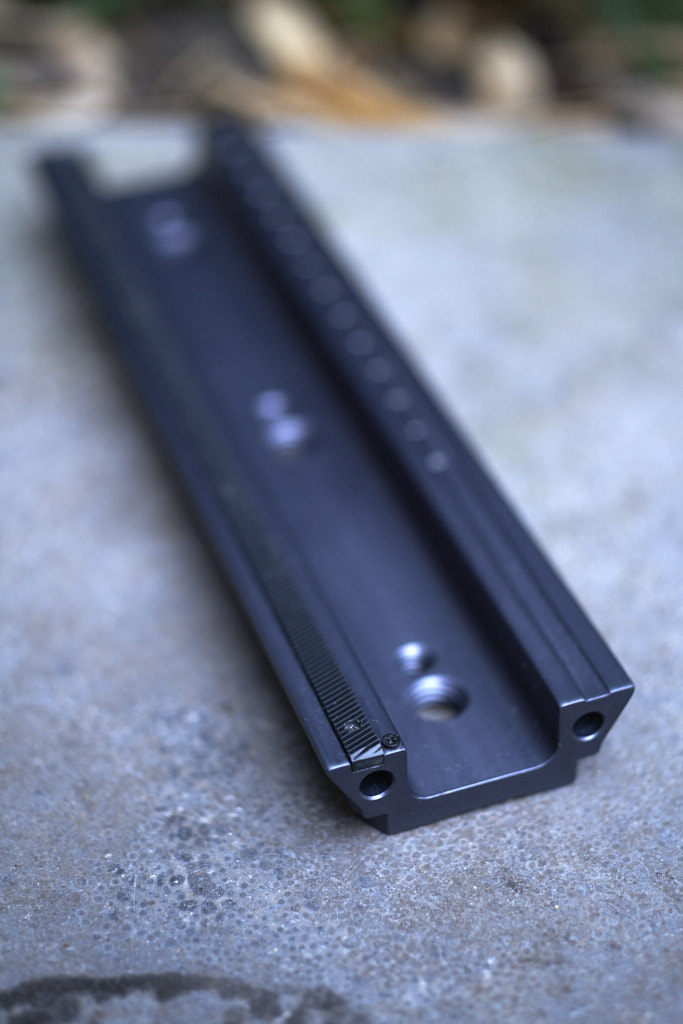
The plan is to mod the bellows so the rear standard is geared as well, using a setup similar to the RRS focusing rail. I.e.a threaded end along the length of the bellows and a turning nob at the rear (1 - 2 cm in diameter, which could easily be turned in increments).

The intention is to focus with the front standard and do the increments for focus stacking with the read standard using above mod.

Question is - what size of thread to use? I.e. how many mm's should the read standard move per rotation.

I am working mostly with a 100mm f4 (@f4 or f5.6 as indicated on barrel) at close up magnifications 1:4 or so. I do intend to venture into perhaps 2:1 at some point. I suspect the difference in step size between 1:4 and 2:1 is substantial - I try to find a balance between not having to turn XXX times at low magnifications and small increments of turns on a large knob at higher magnification.

I could make some estimations based on DOF overlap etc., but I am unsure how it will 'feel' in reality. Has anyone tried something similar and can advise?

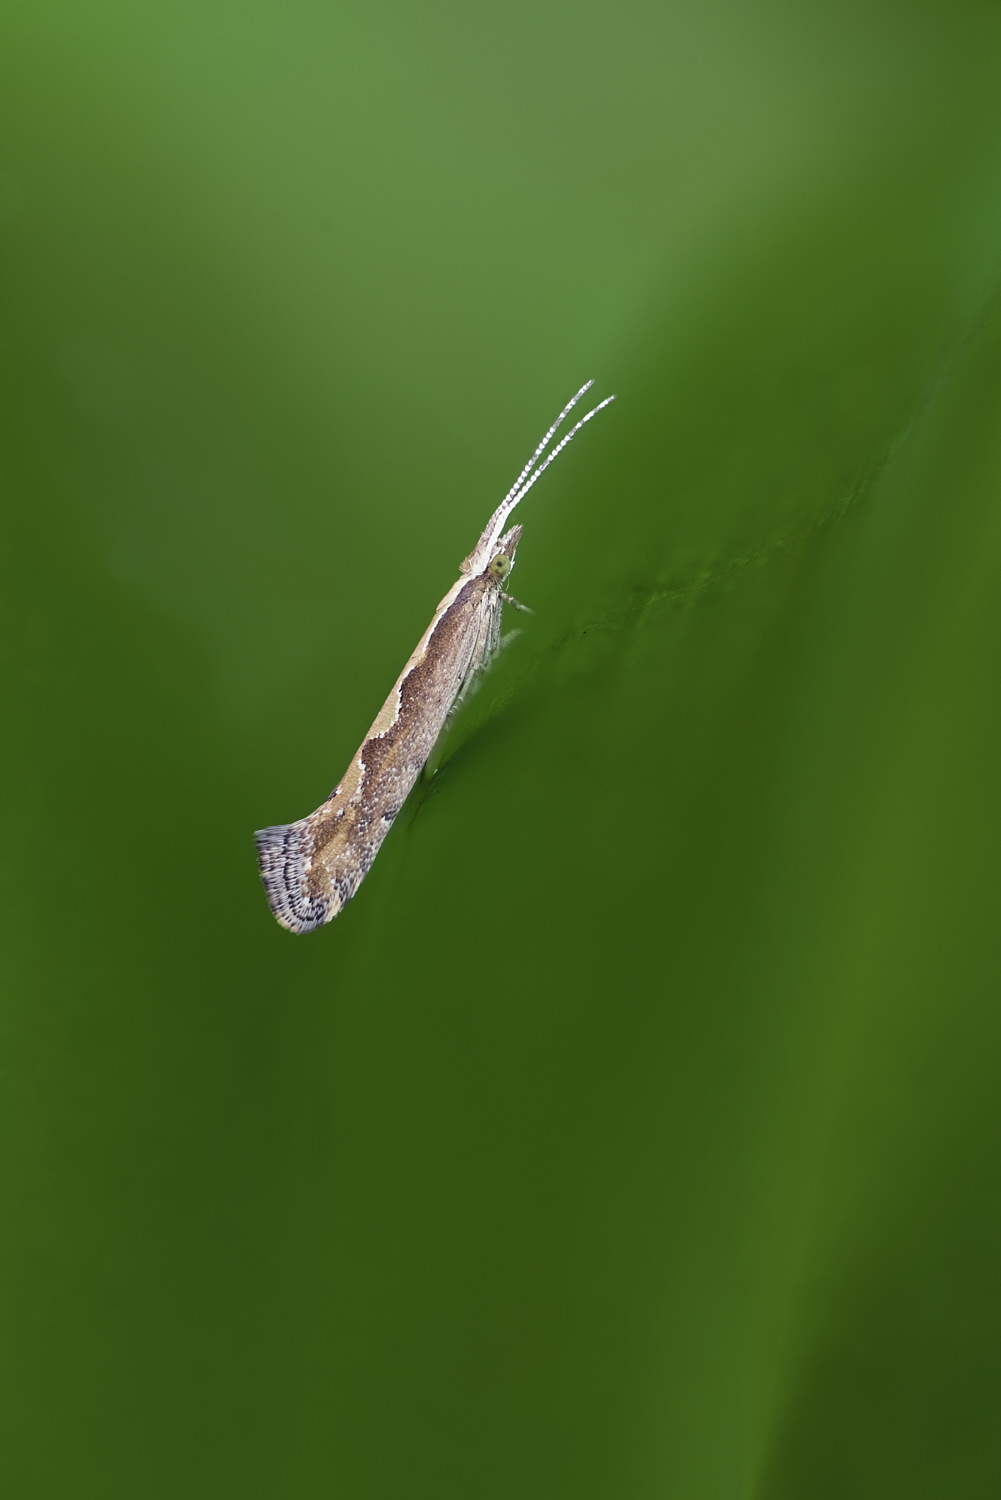
Some images to give an idea of the application. The moth in green is circa 1:1.

Image
stack 4 by Hans van den Bosch, on Flickr

Imagestack 2 by Hans van den Bosch, on Flickr

Imagestack by Hans van den Bosch, on Flickr

Imagestack 1 by Hans van den Bosch, on Flickr

rjlittlefield
Site Admin
Posts: 23597
Joined: Tue Aug 01, 2006 8:34 am
Location: Richland, Washington State, USA
Contact:

Post by rjlittlefield »

Hans, welcome aboard!

Your images look very nice.

However, the third and fourth images are too wide for this forum. They are 1500 pixels wide, versus the forum's nominal limit of 1024. The extra width messes up the page format so that on many monitors, readers must scroll horizontally on every line just to read your words. In the future, it would be better if you post smaller images here, with links to larger ones if you want.

Now, about the step sizes...

The key fact you need to know is that DOF at the sensor is related to DOF at the subject by a factor of magnification*magnification (that is, magnification-squared).

Example #1: at magnification 0.5, if subject-side DOF is 1.5 mm, then the sensor-side DOF is 1.5*0.5*0.5 = 0.375 mm.

Example #2: at magnification 2.5, if subject-side DOF is 0.05 mm, then the sensor-side DOF is 0.05*2.5*2.5 = 0.3125 mm.

To get estimates of subject-side DOF, you can use any of the standard formulas, or calculators, or look up values in the tables at http://zerenesystems.com/cms/stacker/do ... romicrodof .

Then just multiply by magnification-squared to get the corresponding sensor-side DOF.

Your rear bellows step will be equal to the sensor-side DOF, or maybe 30-50% smaller than that in order to get some depth overlap between slices.

--Rik

Lou Jost
Posts: 5984
Joined: Fri Sep 04, 2015 7:03 am
Location: Ecuador
Contact:

Post by Lou Jost »

You could just buy a Nikon bellows which has both standards geared. And since you don't have to worry about infinity focus, you could convert this bellows to Canon or some other body brands fairly easily just by adding rings and things.

By the way your images are beautifully composed and lit.

Joco
Posts: 29
Joined: Wed Dec 28, 2016 8:06 am
Location: Amsterdam
Contact:

Post by Joco »

Thanks Rik - I understand the resolution issue. Will do better next time, starting with the files below :D

Thanks Lou - walking in 'the field' (actually garden or city parc) with a bellows is quite different from freehand photography. Subjects have to fulfil a lot of requirements before I even start. Indeed light, lack of wind movement, possibility to position tripod etc.. So I end up with very few images.

Btw I forgot to mention I shoot with a Sony A7r2, so full frame sensor.

I have the Novoflex bellows now, so for now won't get another (Nikon) one. First pursue this. So far it is really nice.

Pictures of the unit are below. The add on knob has 30 0,5 mm markings, smaller steps are no problem but complete guesswork (I just do the smallest I can and overshoot). The hollow space between rail and standards is 12 mm heigh and could hopefully accommodate a spindle.

I'd love to mount the lens more recessed, but the tube does not pass the C/Y - M39 adapter. The material at the threaded (M39) side is too thick thus the opening too thin. Need to find a solution at some point. Currently had to insert a 20mm extension ring (internals removed).

ImageNovoflex140 by Hans van den Bosch, on Flickr

ImageNovoflex141 by Hans van den Bosch, on Flickr

ImageNovoflex139 by Hans van den Bosch, on Flickr

ChrisR
Site Admin
Posts: 8671
Joined: Sat Mar 14, 2009 3:58 am
Location: Near London, UK

Post by ChrisR »

I suspect a M6 x 1mm pitch thread would be OK, but I'd test the idea on something less nice. EG a Vivitar bellows, well below $100:

Image
Chris R

Joco
Posts: 29
Joined: Wed Dec 28, 2016 8:06 am
Location: Amsterdam
Contact:

Post by Joco »

Thanks for the suggestion Chris!

Actually the mod would be almost non-destructive. The only thing that is needed is a threaded hole in the base of the read standard. Which is not in sight.

ChrisR
Site Admin
Posts: 8671
Joined: Sat Mar 14, 2009 3:58 am
Location: Near London, UK

Post by ChrisR »

If I did it, I'd immediately want to alter it! :roll:
Would you have access to a nut or knob? From front, rear or both?
What about graduations/markings?
Chris R

Joco
Posts: 29
Joined: Wed Dec 28, 2016 8:06 am
Location: Amsterdam
Contact:

Post by Joco »

What would you do Chris?

Markings are one the rail - cm/mm. None on the standard drive knob of the geared standard.

The standards can easily be removed. The locking knobs turn out no issues. The gear - I can't see how they mounted it. I.e. I am not comfortable disassembling it.

soldevilla
Posts: 684
Joined: Thu Dec 16, 2010 2:49 pm
Location: Barcelona, more or less

Post by soldevilla »

It seems very easy to install a M6x1 rod, with a handle divided into 100 parts. I have used it in my transportable device and I can make movements of 0.01mm.

The modification seems simple and reversible, it is necessary to dismantle the current system of gear, nothing that can not be reassembled.

Image

ChrisR
Site Admin
Posts: 8671
Joined: Sat Mar 14, 2009 3:58 am
Location: Near London, UK

Post by ChrisR »

What would you do Chris?
What ^he^ did!
If you have room for a knob.
Other standard threaded, knob end standard captive/bearing.
Chris R

Joco
Posts: 29
Joined: Wed Dec 28, 2016 8:06 am
Location: Amsterdam
Contact:

Post by Joco »

Thanks all for your welcome and suggestions!

When completed I'll post some pics of the unit - and hopefully some taken with it :-)

Charles Krebs
Posts: 5865
Joined: Tue Aug 01, 2006 8:02 pm
Location: Issaquah, WA USA
Contact:

Post by Charles Krebs »

One additional thought.

You might want to play around with the rear standard with camera attached and see if it seems to track adequately when it is loosened to the degree needed to let is slide via a lead-screw. (I am guessing you do not intend to lock it down at each step). When I say "track adequately" what I mean is the potential wobble left/right/up/down. Since you are working at such modest magnifications it is not as critical as if you were at 5X or above, and the software is remarkably good at aligning images that shift a bit. But some dovetails can get pretty sloppy when not tightened down.

I use a Novoflex Castel-L rail with my 100mm macro and the 1-5X MPE and it works pretty well, but the entire camera+lens is mounted in a fairly balanced position on the platform. The rail cross-section seems to be the same type as used on the bellows.

Joco
Posts: 29
Joined: Wed Dec 28, 2016 8:06 am
Location: Amsterdam
Contact:

Post by Joco »

Thanks for the suggestion Charles - I mounted the camera and checked. I can't feel any wobble (there will be some of course).

This particular bellows is obviously intended to support far heavier cameras, so the A7 is below specs.

Btw I have the Castel-Q (same as the -L, just with arca-swiss coupling) and it is exactly the same rail cross-section.

ChrisR
Site Admin
Posts: 8671
Joined: Sat Mar 14, 2009 3:58 am
Location: Near London, UK

Post by ChrisR »

I wonder if you could steal any ideas or parts from one of the $50 Chinese rails?

http://www.photomacrography.net/forum/v ... hp?t=32835
Chris R

Joco
Posts: 29
Joined: Wed Dec 28, 2016 8:06 am
Location: Amsterdam
Contact:

Post by Joco »

Which ones Chris?

The only thing I could find which is close is this one (expensive)

http://www.ebay.com/itm/SUNWAYFOTO-Macr ... Sw2xRYZi0A

Post Reply Previous topicNext topic